There are multiple ways to optimize the web server and WordPress for speed and security. One way to optimize the database and clean up obsolete data is using the WP-Optimize plugin.
This plugin recently also added the feature to compress and serve to optimize media images.
In this article, we will learn how to set up and schedule the WP-Optimize plugin for automated MySQL database clean-up and compressing the image size.
If you’re following us, this is the sixth article and video demo in the #WordPressBlog series. We previously published a WordPress Fail2ban plugin setup for improving security and protection from brute force attacks.
Without further ado, let’s dive into setting up WP-Optimize —
Install WP-Optimize Plugin in WordPress
Let’s start with installing the WP-Optimize plugin in our WordPress CMS. Follow the steps to install WP-Optimize:
- Login to WordPress Dashboard
- Navigate to Add New under the Plugins menu
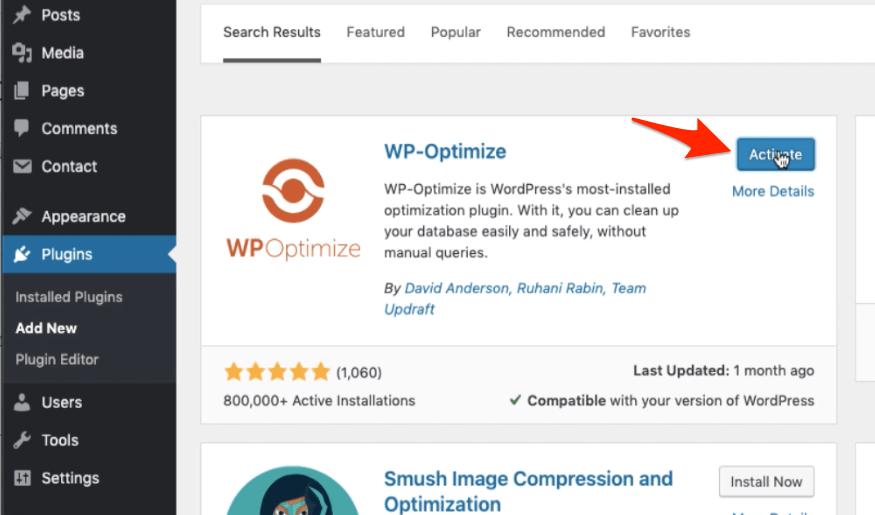
- Search and Install the WP-Optimize plugin from the WordPress repository
- Activate the Plugin
- Now you’ll see a new menu added to your WordPress menu options — WP-Optimize
Click on the menu to navigate to Database Optimization.
Database Optimization and Clean-up
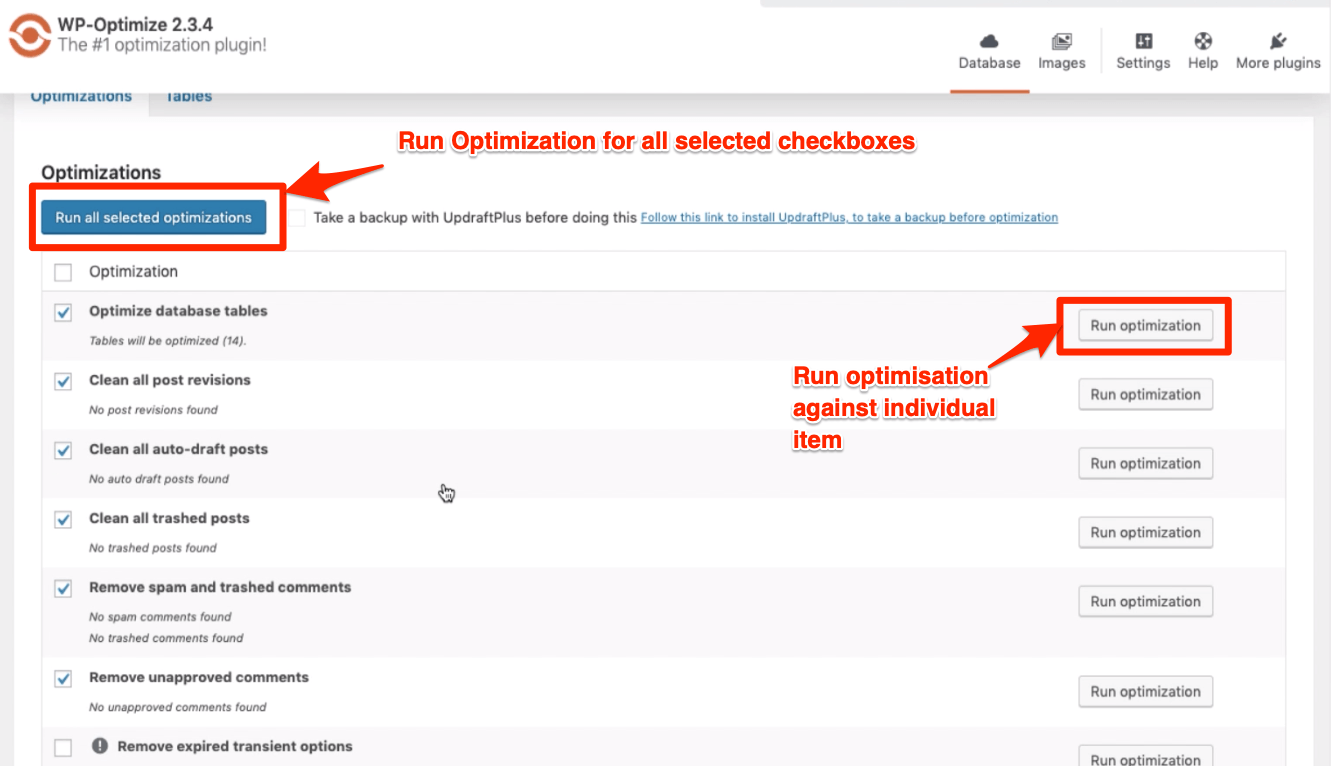
This is the first menu option to clean up the database manually. You can view all the existing database tables that it can optimize. For each action, just hit the [Run Optimization] command button again.
You can also select the checkbox against each command that you want to run and run the optimization in a go. Say, for example, if I want to clean up post revisions, delete the trashed post, and
spam comments. Then you need to enable the checkboxes against the same and hit the [Run all selected optmization] command button.
The next tab under the Database menu is to view all the ‘Tables’ in our MySQL database installation against WordPress. This tab will display all the tables generated due to plugins and options we have installed in our WordPress.
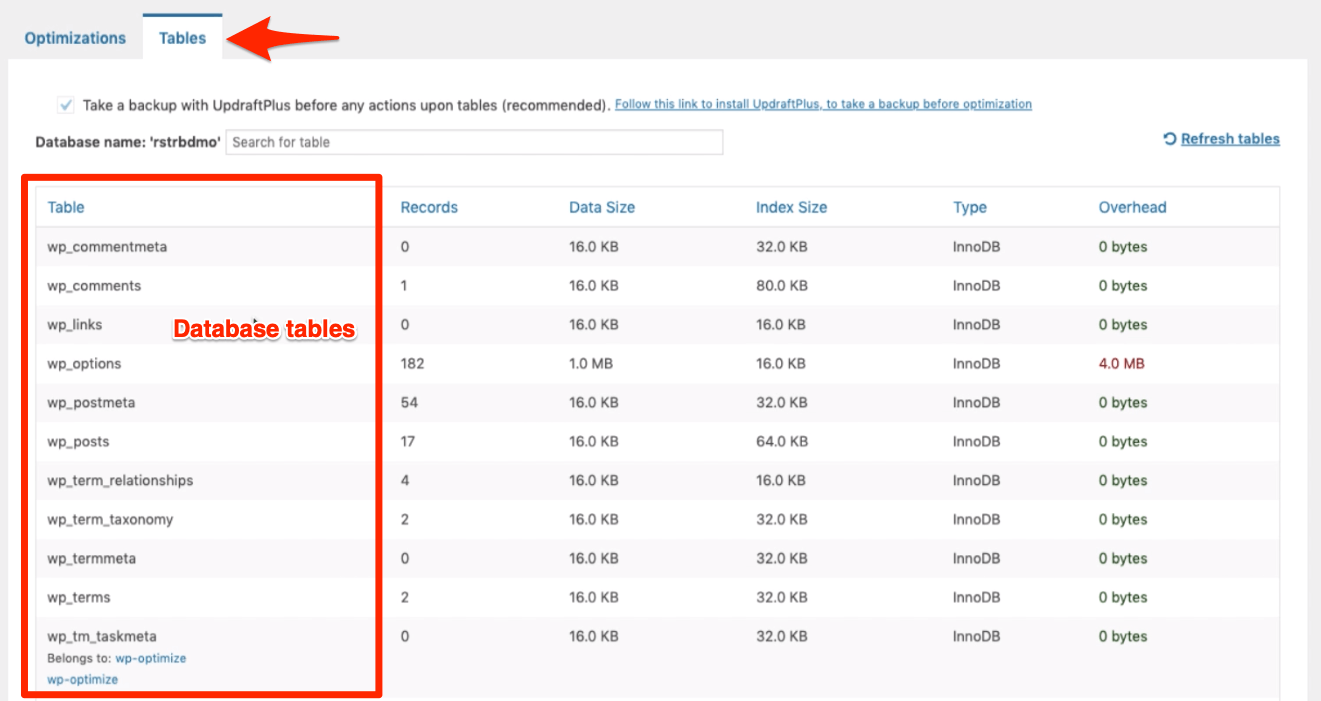
You can delete the entire table from this tab if there are any obsolete databases from uninstalled plugins.
Image Optimization Setup
As I mentioned, this was the new feature added to WP-Optimize, and I think it’s a great addition. I was using the WP reSmush.It is a plugin to compress and optimize images.
Now, this plugin has added the feature to use the same reSmush.it API compresses the images; I no longer need the extra plugin. Hence, I uninstalled the plugin and set up the image file optimization with the WP-Optimize plugin itself.
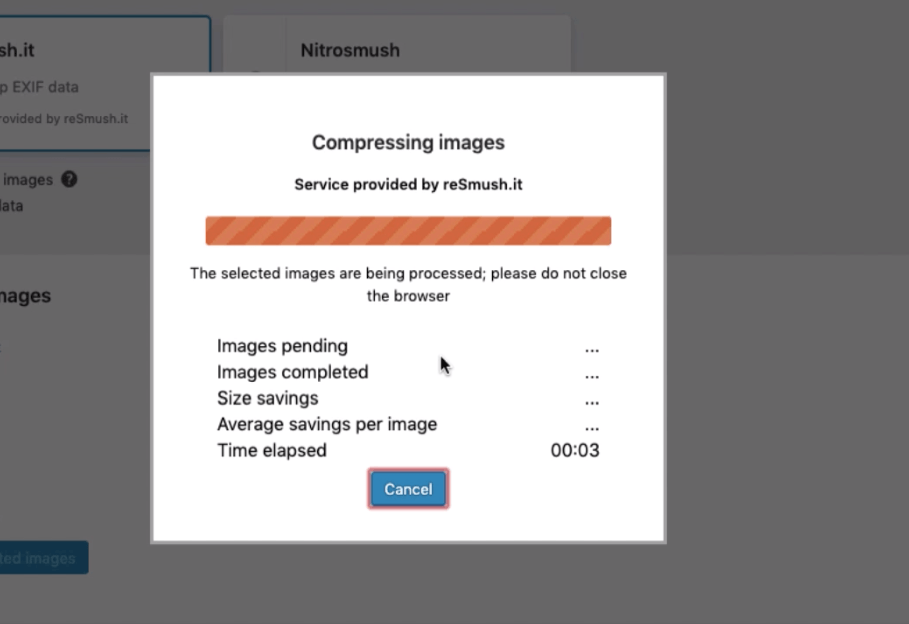
Please navigate the Images menu under WP-Optimize and set it up per your needs. My current setup looks like the below:
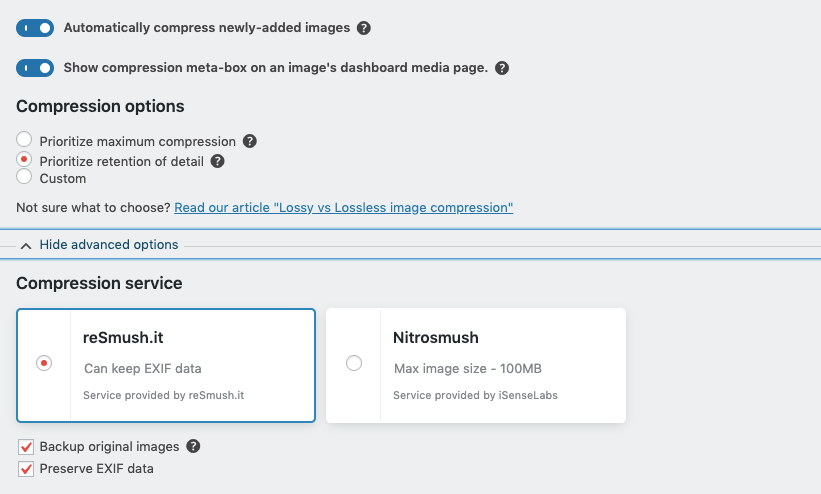
This Image Optimization set up helps with:
- Automatically Optimize the Images when uploaded — generally take 30 mins after uploading
- Show the compression size and total file size saved after compression
- Optimize and compress the image losslessly to retain the maximum details and EXIP data
- And lastly, retain the original image backup to revert if anything goes wrong
As you can see, there are two compression services available: reSmush.it & Nitrosmush. I never tested how much compression different each makes; however, I’m pretty happy with reSmush.it service.
We can also view all the existing images that are pending compression. You can select your existing media library and bulk optimize from this tab.
Scheduling a Clean-up in WP-Optimize
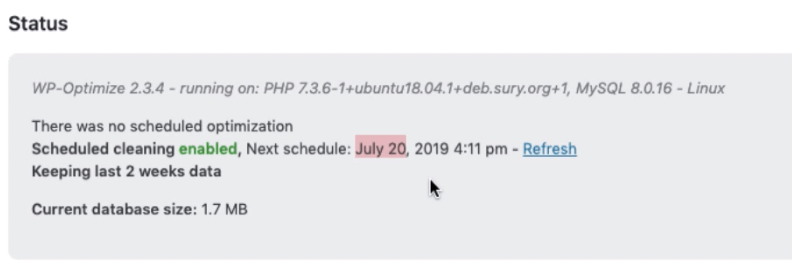
The automatic clean-up scheduling option is available under the Settings menu. We can also select the option to retain the data for a specific period, like one week or two weeks, etc. Once the retention period is surpassed, we can delete the data with manual clean-up or scheduling options.
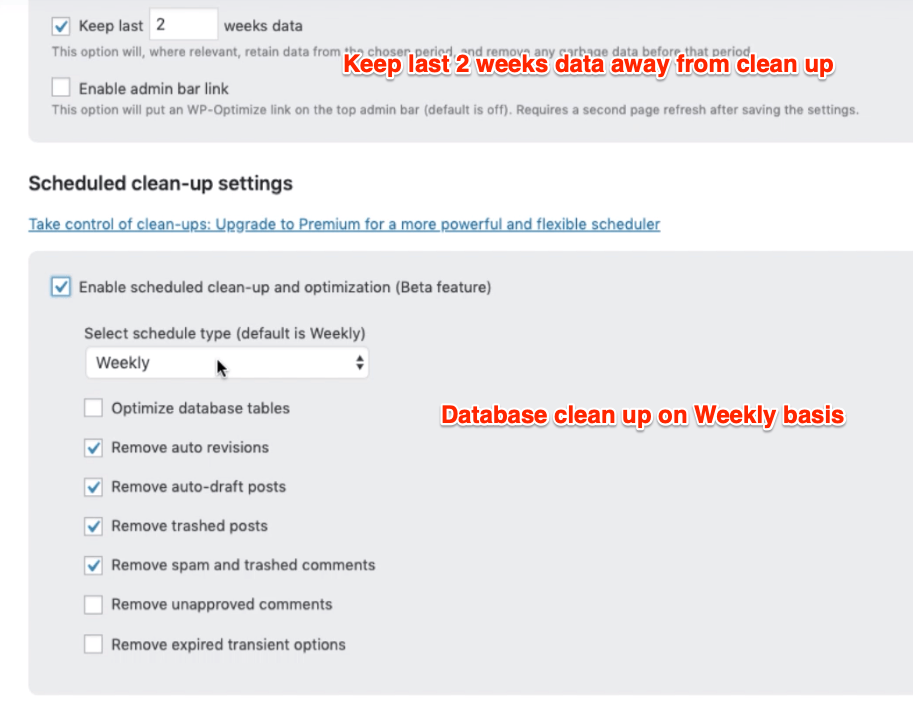
You can schedule the clean-up for the database table for daily, weekly, fortnightly, and monthly. And also, select the database tables you need to clean up per schedule. Though the scheduling feature is BETA, it works flawlessly and helps automatically maintain WordPress DB.
Video demo of WP-Optimize Plugin Setting
Watch the step-by-step video tutorial of the WP-Optimize setup for database and image optimization. There are also options to enable/disable the comments and trackbacks under the Settings tab.
I hope you liked the video; please subscribe to the youtube channel for more.
What’s Next in the #WordPressBlog series?
Now that we’ve learned how to optimize the WordPress database and media library. Next, we will learn how to set up the free WordPress Photon for images CDN without using the JetPack plugin.


Hi, first of all thanks for the tutorial, I really enjoy your video tutorials
After to do this tutorial in my website, It starts to show this error:
“Error establishing a database connection”
Can you help me with this error ? In the Future is possible to this error apear again ?
Thank you, Danilo. Glad that you find these tutorials helpful. 🙂
Regard your query, looks like your WordPress is not able to connect to MySQL server. These might be couple of possible reasons and solutions.
1. Your MySQL server is not configured with WordPress — verify if your `wp-config.php` file has correct MySQL Database details
2. Your MySQL server is down — consider restarting using `sudo service mysql restart`
3. If you’re getting this database connection error intermittently — consider adding a swap space on your cloud server (covered in this hyperlinked article)
4. If the issue still persists even after adding `swapspace` — upgrade your server to next higher RAM size plan
If you followed the guide, then probably you might have $5 DigitalOcean plan. Upgrading to $10 with 2GB RAM should eliminate the `error establishing a database connection`.
Let me know how it goes with you!
lscache best caching plugin for wp sites.
LSCache doesn’t fully support on the LEMP stack.
u can contact LiteSpeed support they are really very helpful in terms of support.