Every software and system is vulnerable to hacking; hence, securing an online website or blog is a primary job. As we are using WordPress CMS, thankfully, we have the WP fail2ban plugin improving overall security and tackling malicious parties.
In this article, I will cover how to install and configure the fail2ban program. Fail2ban will help WordPress from brute-force attacks and eliminate ban login attempts.
If you’re not aware, this is the fifth article and video demo of the #WordPressBlog series. We previously published about basic WordPress Plugins setup.
Let’s dive into learning more about the fail2ban program —
What is Fail2ban?
Fail2ban scans log files and ban IPs that show the malicious signs — too many password failures, seeking for exploits, etc. It protects computer servers from brute-force attacks.
The program is written in the python script and out-of-box support various software programs and servers like Nginx, Postfix, Sendmail, etc.
In our case, we will be using Fail2ban to support WordPress malicious login attempts.
Install fail2ban on Ubuntu & WordPress
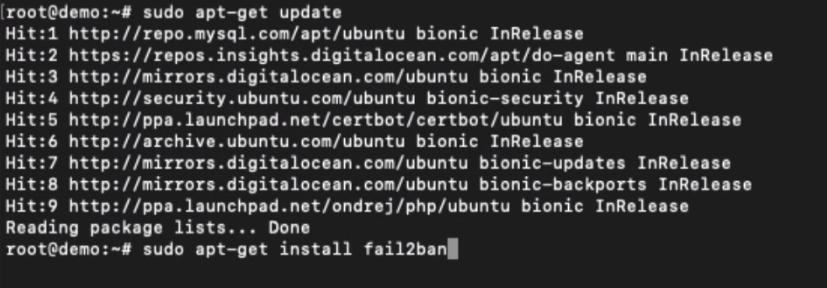
The fail2ban is not pre-installed in the Ubuntu cloud server. You can run the following command to update the APT repository and install the fail2ban program.
sudo apt-get update
sudo apt-get install fail2ban
Once you’ve installed the program on the server, you will need to add the WordPress Plugin WP fail2ban.
This plugin help to capture all the WordPress logins and IP in a log file. Fail2ban will use this log file record to ban the IP address with multiple invalid attempts.
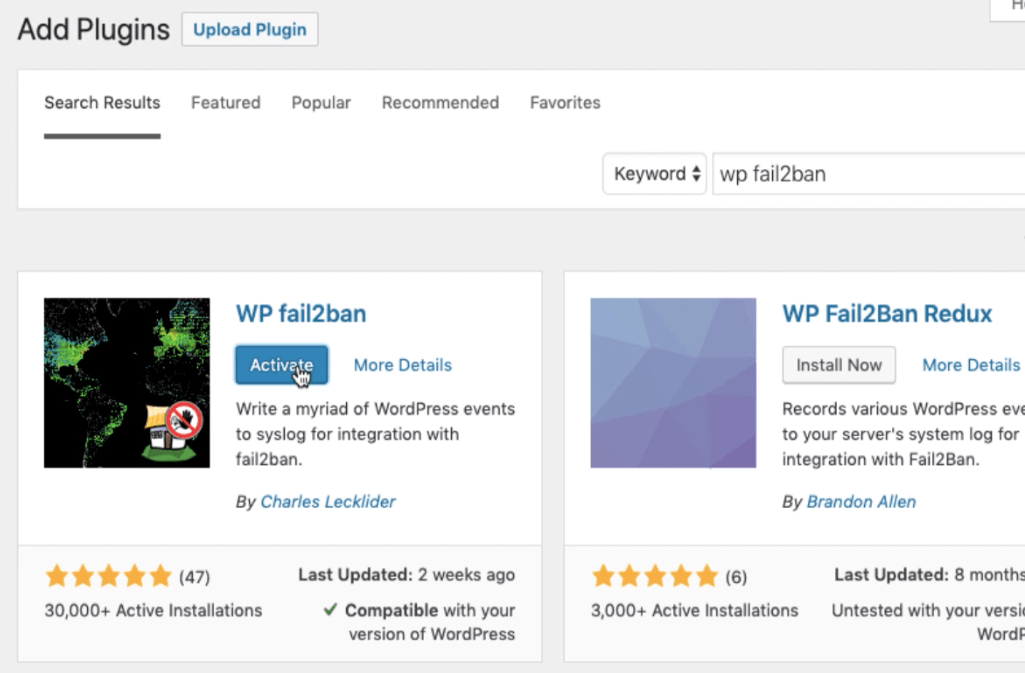
Follow the steps to install WP fail2ban on WordPress:
- Login to WordPress Dashboard
- Navigate to Add New under the Plugins menu
- Search and Install WP fail2ban plugin
- Activate the Plugin, and that’s all
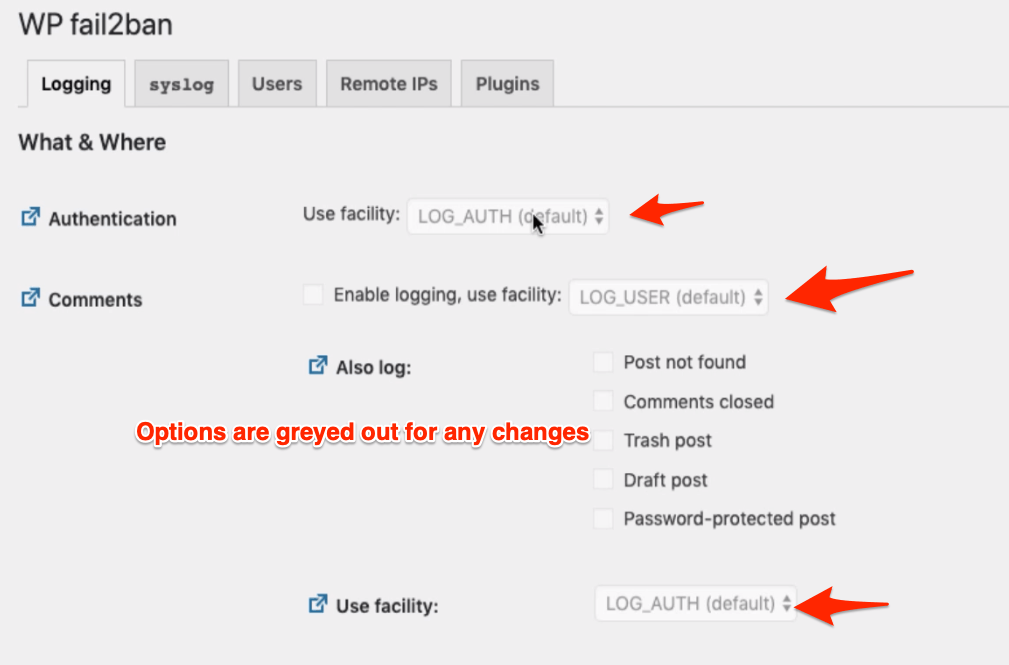
The Plugin also has a premium version that allows configuring in UI. However, since we are using the free version, we need to manually set up the filter and jail condition on the server-side.
Don’t worry; it’s pretty easy!
Setting up the Filter and Jail
Now that we have installed it on both the server and WordPress let’s copy the backend filter matching regexes file in the fail2ban directory.
Use the below command to copy the WordPress hard regexes conf file to the filter.d directory.
sudo curl https://plugins.svn.wordpress.org/wp-fail2ban/trunk/filters.d/wordpress-hard.conf > /etc/fail2ban/filter.d/wordpress.conf
[Note: there is also a soft filter configuration file; however, I strongly recommend using the hard for better security.]
Next, we will set up the jail for invalid authentication. Create a WordPress Jail file using the below command:
sudo nano /etc/fail2ban/jail.d/wordpress.conf

Paste the below Jail rules in the wordpress.conf file we created above.
[wordpress]
enabled = true
filter = wordpress
logpath = /var/log/auth.log
port = http,https

Save and close the nano editor with Jail configuration.
Customizing the Jail
You can customize the Jail OR Ban configuration using the jail.conf. There are multiple settings available in this file.
However, I’d strongly suggest not to make any changes unless you know what you’re doing.
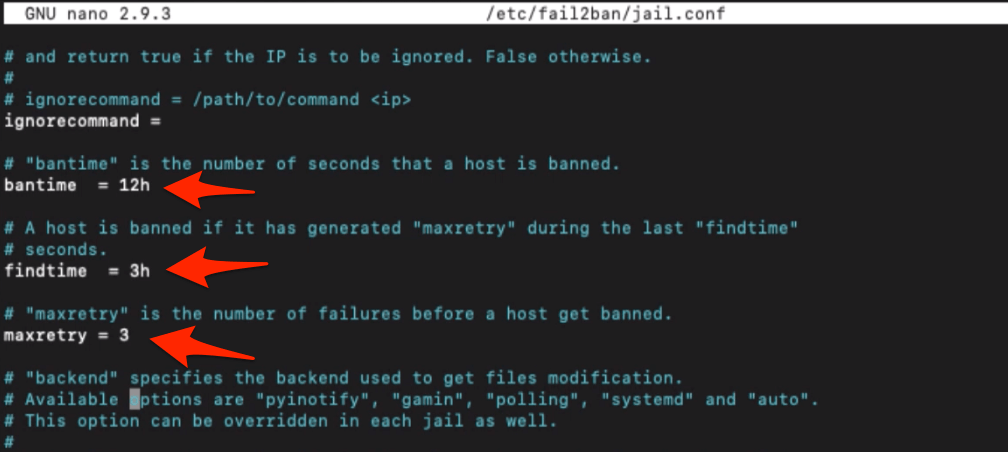
sudo nano /etc/fail2ban/jail.conf
The entries will be available under [default] code block. And I will be making only three changes:
- Maximum login attempts before the ban to 3
- Maximum 3 login attempts in the time span of 3 hours (i.e. findtime)
- Maximum jail or ban for 12 hours after three invalid logins attempts
maxretry = 3
..
findtime = 3h
..
bantime = 12h
Now that we are all set with Filter and Jail configuration, restart the fail2ban using the below command:
sudo service fail2ban restart
Finally, test the fail2ban with multiple invalid logins to your WordPress login screen. I’m sure after the third incorrect login attempt, the WordPress blog will be inaccessible for 12 hours.
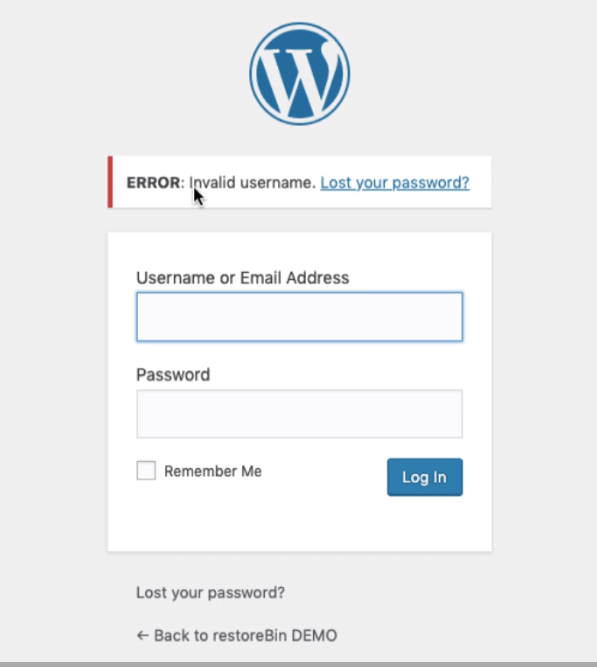
Just in case you got your IP address banned, you need to look up the Banned IP Address in [log]/etc/log/fail2ban.log[/code].

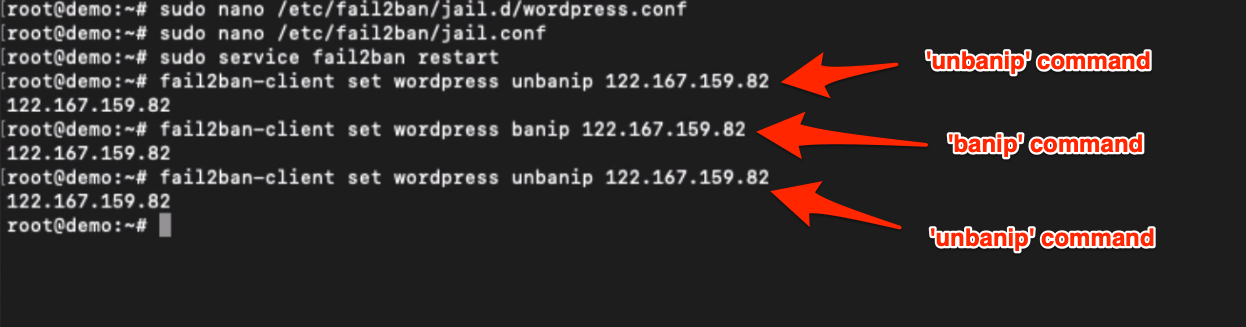
And use the below command to un-ban:
fail2ban-client set wordpress unbanip YOUR.IP.ADDRESS.HERE
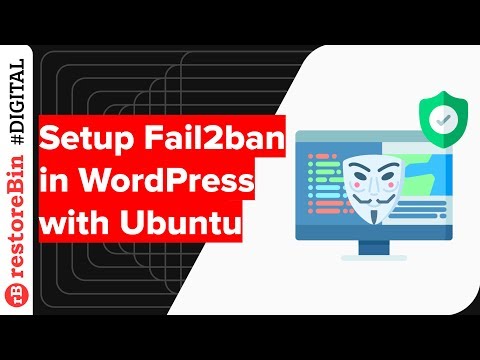
Watch the setup video of fail2ban
Watch this video setup of fail2ban and learn how to configure the jails and filters to block invalid login attempts.
I hope you liked the video; please subscribe to our channel for more updates.
What’s next in the #WordPresCloud Series
Now that you’ve learned how to secure the WordPress installation with the WP fail2ban plugin, we will learn how to optimize the MySQL database. We will be using a sweet plugin, WP-Optimize, for the same.

Hi, i have a question about WP-fail2ban, i have my server configured on GMT-5 so almost all on the server works with this timezone including my auth.log. Also i set this timezone to the wordpress configuration.
the problem is when fail2ban writes on the auth.log it does that with UTC time. So as result fail2ban doesnt detect the login issues and skip the ban to the user.
Jan 28 18:44:04 user sshd[11194]: Received disconnect from 37.187.XXX.XXX port 58090:11: Bye Bye [preauth]
Jan 28 18:44:04 user sshd[11194]: Disconnected from 37.187.XXX.XXX port 58090 [preauth]
Jan 28 23:44:09 user wordpress(www.xxMySite.com.co)[10585]: XML-RPC authentication attempt for unknown user admin from 78.47.218.spammer
Jan 28 23:44:12 user wordpress(www.xxMySite.com.co)[10584]: XML-RPC authentication attempt for unknown user admin from 78.47.218.spammer
Jan 28 23:44:15 user wordpress(www.xxMySite.com.co)[10583]: XML-RPC authentication attempt for unknown user admin from 78.47.218.spammer
Jan 28 18:44:20 user sshd[11228]: Failed password for root from 150.158.XXX.XXX port 40932 ssh2
Jan 28 18:44:22 user sshd[11228]: Received disconnect from 150.158.XXX.XXX port 40932:11: Bye Bye [preauth]