I’m excited to share that I installed the Flarum community and launched our WPAQ.com forum — a community for exploring and discussing tips on WordPress, aka WordPress, Answered Questions forum.
It’s powered by Flarum forum software loaded on the fastest Nginx server and WordPress blogging CMS running on the DigitalOcean cloud server. The best part, both platforms share the same configurations and caching mechanism.
I struggled a lot while installing the Flarum forum, as their official installation doc is unclear and detailed. It took me two days to complete the setup without disturbing my existing blogs. And yes – I have done it!
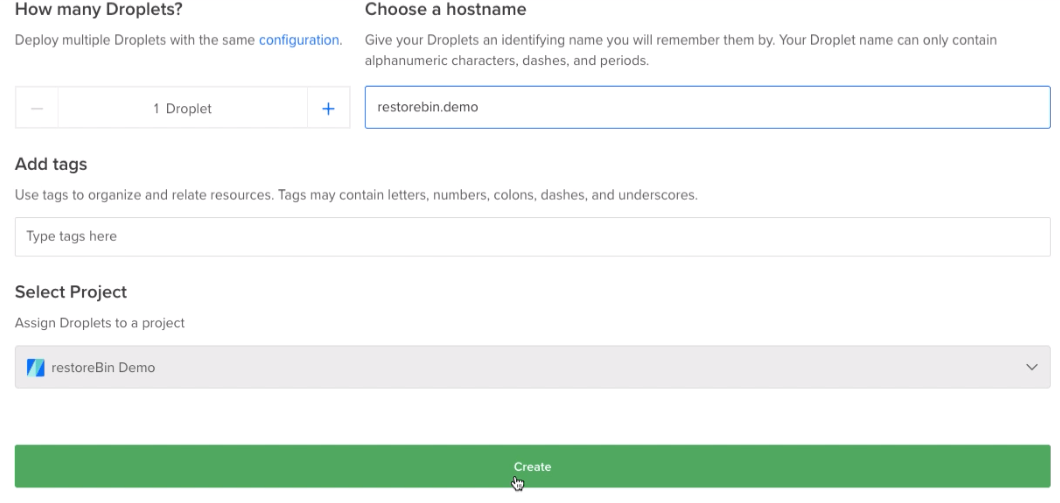
Here is what my setup looks like on the DigitalOcean server:
- ~/ root folder
- ~/var/www/demo/ Current WordPress installation
- ~/var/www/demo/forum/ New Flarum installation
- ~/var/www/demo/ Current WordPress installation
Also, both WordPress and Flarum share the same nginx.conf file, which makes the configuration lot more accessible and more secure. You can follow this detailed guide about WordPress on the DigitalOcean cloud.
Note: The post has been updated to support the latest PHP version. However, the screenshots/images still reflect the older version.
Let’s dive into installing the Flarum forum in Ubuntu Cloud Server —
Requirements to Install Flarum
Before we start the installation process, I assume you already have a LEMP stack server configured. If not, then refer to the guide to installation.
Here are the basic requirements for the Flarum forum program to run smoothly:
- Linux OS – I prefer Ubuntu
- Nginx or Apache webserver
- PHP 7.4+ with the following extensions: dom, gd, json, mbstring, OpenSSL, pdo_mysql, tokenizer
- MySQL 5.6+ or MariaDB 10.0.5+
- SSH (command-line) access to run Composer and installation
- SFTP access with FileZilla or a similar FTP client installed
My current LEMP Stack is configured with the latest requirements running on MySQL database and Nginx web server. You can follow this guide for details – Powerful LEMP Stack.
Adding a Swap Space on Ubuntu Server
Installing Composer and Flarum programs need extra RAM. The $5 DigitalOcean has a 1 GB RAM size to run the forum software; however, it needs extra processing memory when installing the Flarum.
You can skip adding the Swap file if you’re running on over a 2 GB RAM server. For less than 2 GB RAM servers, Swapfile is a must.
Swapfile is a piece of hard disk space that will act as RAM whenever there is a demand for memory to execute specific programs. We will be using this Swapfile to install Flarum on our Cloud Server.
Creating the Swap space
Run the following command to verify if you already have a swap file:
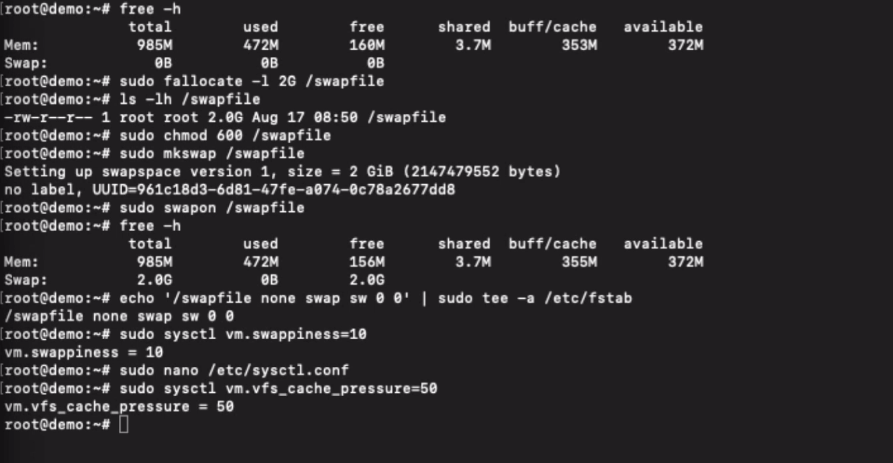
free -h
If not, allocate a separate partition space in the hard disk for the swap file. The general thumb rule about swapfile is to double the actual RAM size. In my case, I have the 1GB RAM server, so I’ll be creating the Swap file of 2GB size.
sudo fallocate -l 2G /swapfile
We can cross-verify if the correct amount of partition is allocated using the below command:
ls -lh /swapfile
Now let’s make the file available only to the root user.
sudo chmod 600 /swapfile
The output will show that root the user has read and write permissions.
Now mark the file as swap space by hitting the below command:
sudo mkswap /swapfile
Finally, run the command to allow the system to utilize the swap file.
sudo swapon /swapfile
Run the following command to verify the free space as the existence of swap space.
free -h
We have successfully created the valid swap space until the next reboot. However, we need to make additional changes if we want the swap space to be available even after a restart.
To make it permanent, run the following command to add the swap information into the /etc/fstab file.
echo '/swapfile none swap sw 0 0' | sudo tee -a /etc/fstab
We have now successfully created the swap file space in a cloud server.
Tweaking the Swap Space
As mentioned, that swap will be used when our server runs out of memory. It is a temporary solution at peak utilization hours, but using the swap file is quite ‘expensive’ as it degrades the overall server performance. Hence, we should generally avoid using swap space.
Also, by default, the system is set to use the swap file anywhere from 0 to 100%. However, we should limit this to a lower value, close to 10%.
To adjust the swap usage, we should adjust the swappiness value. Run the following command to set the swappiness value to 10.
sudo sysctl vm.swappiness=10
And next, add the following line of code into the system configuration file to make these changes permanent and persist even after a reboot.
Edit the system configuration file using the below command:
sudo nano /etc/sysctl.conf
And add the following line at the bottom.
vm.swappiness=10
Similarly, we should adjust the swap file’s cache pressure settings. It will avoid heavy usage of swap space for any caching.
Run the flowing command to set the cache pressure to a maximum of 50%:
sudo sysctl vm.vfs_cache_pressure=50
Again open the system configuration file:
sudo nano /etc/sysctl.conf
And add the following line of code at the end in the same system configuration file:
vm.vfs_cache_pressure=50
That’s it. The Swap space is added to your cloud server and tweaked for the best performance settings.
Installing the required PHP modules
Flarum required a few additional modules to be installed along with the commons. To install all the required files, run the below command lines in SSH.
sudo apt-get install php7.4-mbstring php7.4-gd php7.4-json php7.4-xml php7.4-zip php7.4-curl openssl
sudo phpenmod pdo_mysql
It will completely install all the necessary modules for the Flarum to run on PHP Processor.
Creating a new database table in MySQL
Flarum needs the database to store and retrieve all the information stored in the forum. It supports both MySQL and MariaDB.
We can even use the same database we created for WordPress in MySQL, but that would be less secure. Hence we should always create a new database to hold any data for a new program.
Just like WordPress, the Flarum needs three database details while installation:
- Database name: flrmdatabase
- Database user: flrmuser
- Database password: flrmpassword
We will create a new database and username along with the password for Flarum using these dummy values. Login cloud via an SSH client and run the following commands to generate the MySQL DB to install Flarum Forum:
Login into MySQL from SSH using the root account:
mysql -u root -p
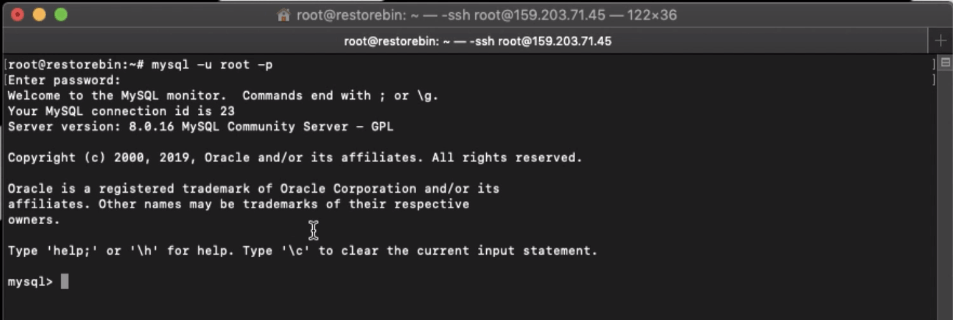
Enter the MySQL root account password when prompted.
Let’s create a database for Flarum. I’ll be using the dummy values mentioned above; however, you can modify them as you wish.
CREATE DATABASE flrmdatabase;Next, we will create a MySQL user with a password and grant permissions to the database to operate and manage independently.
CREATE USER 'flrmuser'@'localhost' IDENTIFIED BY 'flrmpassword';
GRANT ALL ON flrmdatabase.* TO 'flrmuser'@'localhost';
Now we have created a database and granted a user full permission. Commit the changes to the MySQL server and exit using the following command:
FLUSH PRIVILEGES;
exit;
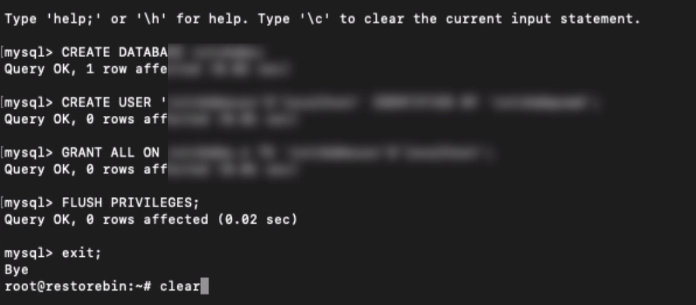
It will terminate the MySQL session, and you will be back in the Ubuntu shell. We will use these new database records while installing the Flarum in the browser.
Installing Composer for Flarum
If you’re unaware, Flarum needs Composer to run the installation and support. The composer is a dependency management tool that the command line terminal can only execute for PHP dependencies. Thankfully, DigitalOcean provides complete root access along with an SSH command.
Below command line will download and install the composer program in your cloud server:
sudo curl -s https://getcomposer.org/installer | php
sudo mv composer.phar /usr/local/bin/composer
Install Flarum Forum Software
Next, we will create the subdirectory folder structure for Flarum installation.
sudo mkdir /var/www/demo/forum
cd /var/www/demo/forum
The previous command cd ... will change our directory selection to the Flarum subfolder. Now install Flarum to create a project inside the subdirectory folder using the below command.
sudo composer create-project flarum/flarum . --stability=beta
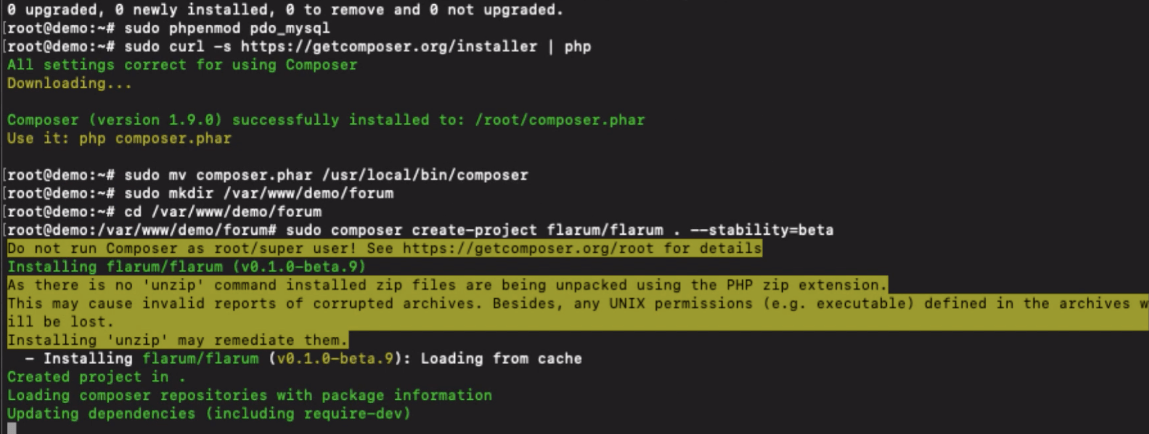
It will download the latest flarum project files and automatically complete the installation. It may take a few minutes to process installation.
Set up and Configure Flarum for sub-directory
Next, grant read & write access to the Flarum folder and change ownership.
sudo chown www-data:www-data -R /var/www/demo/forum/
sudo chmod 0775 -R /var/www/demo/forum/
With the recent changes in the program, Flarum has been installing the files from the /public/ folder within our subdirectory structure. Using an FTP client like FileZilla, move index.php and assets folder available in the public folder to /forum/ subdirectory folder.
You can also move the files using the below command line and ignore the .htaccess file. We are using the Nginx server, which does not support it .htaccess.
sudo mv /var/www/demo/forum/public/* /var/www/demo/forum/
Next, you need to edit the flarum and index.php files to make sure the public directory pointer is changed to the flarum base folder.
Look for similar lines to make the changes so that it will reflect as below, and do not edit any other lines.
require 'vendor/autoload.php';
'base' => __DIR__,
'public' => __DIR__,
'storage' => __DIR__.'/storage',
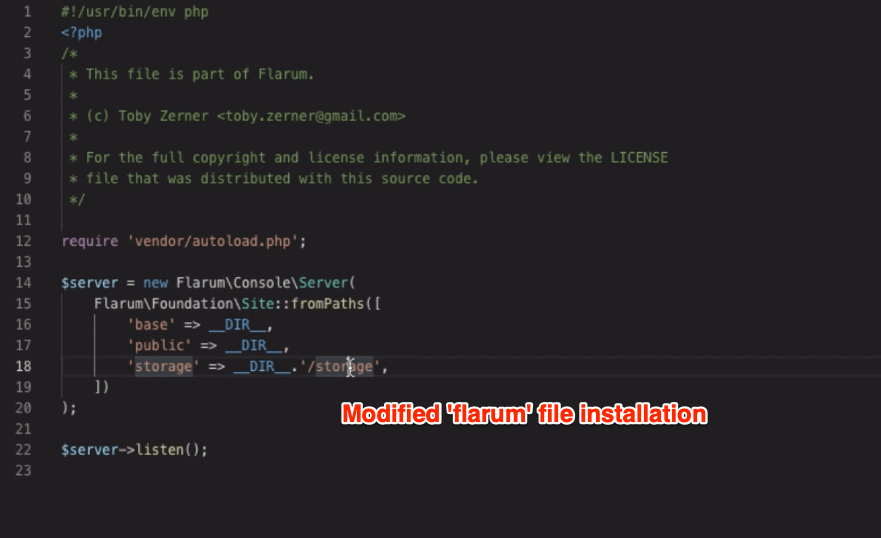
Save both files after editing.
Configuring the Nginx to support Flarum
Next comes the essential part of configuring the Nginx file. If you miss configuring Nginx, the Flarum will always encounter with error 500 alert and never load.
Open the Nginx configuration file, which is used for WordPress. The configuration file is generally located inside this path and can be accessed using FTP:
/etc/nginx/sites-available/
My nginx configuration file name is default; I’ll open add the below line of code within server { ... } block below WordPress location { ... } directive block.
Alert: Please consider having a backup before modifying the .conf file. If anything goes wrong web server, the website will go down.
server { ...
... existing lines...
WordPress location / {} lines
...
// This rule help to read the index.php file in Flarum root folder
     location /forum/ {
        root /var/www/demo;
        try_files $uri $uri/ /forum/index.php?$query_string;
     }
// This rule help to access the sitemap.xml file without any errors
     location = /forum/sitemap.xml {
        try_files $uri $uri/ /forum/index.php?$query_string;
     }
...
... existing lines ...
}
Save the configuration file, and test for any Nginx error.
nginx -t
If the test runs successfully OK, restart the Nginx to commit the changes.
sudo service nginx restart
After installation, try to access the flarum forum in the subdirectory to complete the installation process. Since I’ve installed the forum under the demo site, I will be able to complete the installation:
https://demo.wpaq.com/forum/
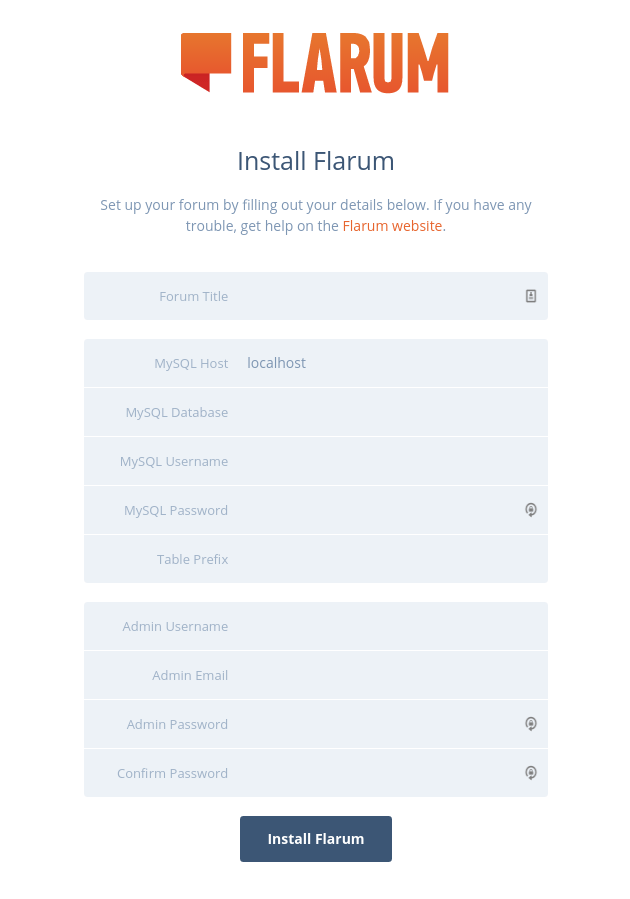
Please enter the details of the MySQL server database tables we created on the installation page. Set up the admin login credentials and password.
For demo purposes, I will be using my existing WordPress database name, username, and password that I created while installing WordPress on the LEMP stack. Even you can use your WordPress database details. However, I strongly recommend creating a separate MySQL database of live Flarum installation.
Once the fields are filled, just hit on to complete the installation. It will take a moment to complete the entire installation. You will be redirected to the Flarum Forum home page after completion.
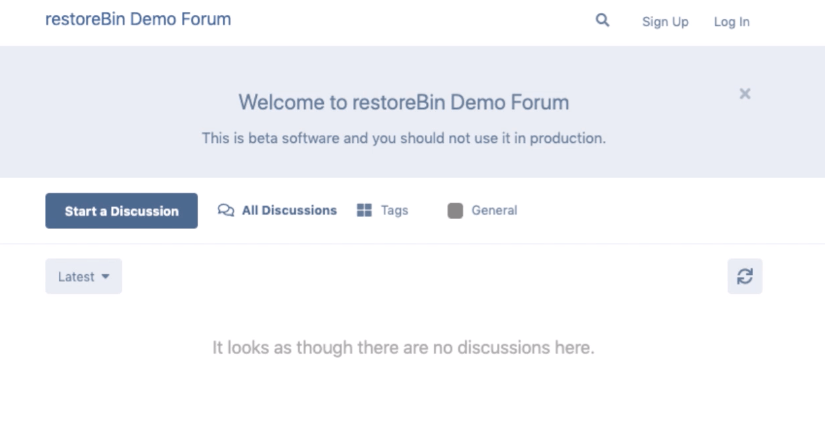
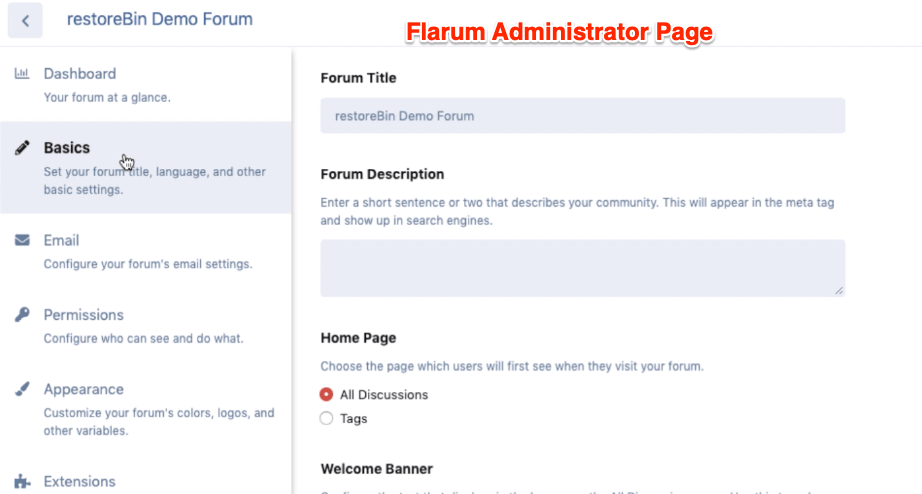
Hit the Log In link and enter the Admin credentials set on the installation page. If everything goes well, you can access the admin dashboard and proceed with a different setup.
Troubleshooting Flarum Install issue
If you’re facing any issues with the installation and login into the Flarum forum, then you should typically consider checking these three files in the installation folder:
- flarum — helps in running the Flarum installation
- index.php — used as Flarum home page file
- config.php — it’s Flarum’s configuration file
The config.php file should be the most crucial file which helps to execute and run the Flarum software. Here is the config.php file snippet for my dummy installation:
<?php return array (
  'debug' => false,
  'database' =>
  array (
    'driver' => 'mysql',
    'host' => 'localhost',
    'database' => 'flrmdatabase',
    'username' => 'flrmuser',
    'password' => 'flrmpassword',
    'charset' => 'utf8mb4',
    'collation' => 'utf8mb4_unicode_ci',
    'prefix' => 'flrm_', << this is optional unless you've set while installation.
    'port' => '3306',
    'strict' => false,
  ),
  'url' => 'https://demo.wpaq.com/forum',
  'paths' =>
  array (
    'api' => 'api',
    'admin' => 'admin',
  ),
);
Let me know in the comments below if you’ve any problems with the Flarum installation and WordPress.
Watch the Flarum Installation Tutorial
Watch this video tutorial to install Flarum software on the Ubuntu LEMP Stack server and WordPress Blog in the root folder. The Flarum is installed in a sub-directory.
I hope this help; please subscribe to our channel for more video.
What’s next after Flarum installation?
We have now completed the installation and also logged into our administrator dashboard. Next, we will see how to install the Flarum extension to enhance the features within Flarum.
The extensions are similar to the WordPress plugin that adds abilities that are not readily available in Flarum installation. We will cover some of the most important and frequently used Flarum extensions to power up our forum software.

What about a post about installing Flarum on a Mac (locally and on a shared server)?
Hi Yuka, I have added the topic in my bucket list. Thank you!
super post, thanks! Hello from Kazakhstan!
Cheer!! 🙂
I am trying on cloudways, will you please help me, if possible do you have any paid services.
Hi Vin, yes – I do offer paid setup. Please drop your request in this hiring form.