One of the best uses of the Ubuntu cloud server is to host a web application or run online publishing software like WordPress on LEMP Stack.
As I’ll mainly focus on deploying WordPress CMS, the below tutorial will help in setup and configuring a powerful LEMP stack on Ubuntu Cloud Server.
Before getting started, log in to SSH and SFTP clients. The following guide will be too technical and will only use the SSH and SFTP to install and configure LEMP Stack remotely.
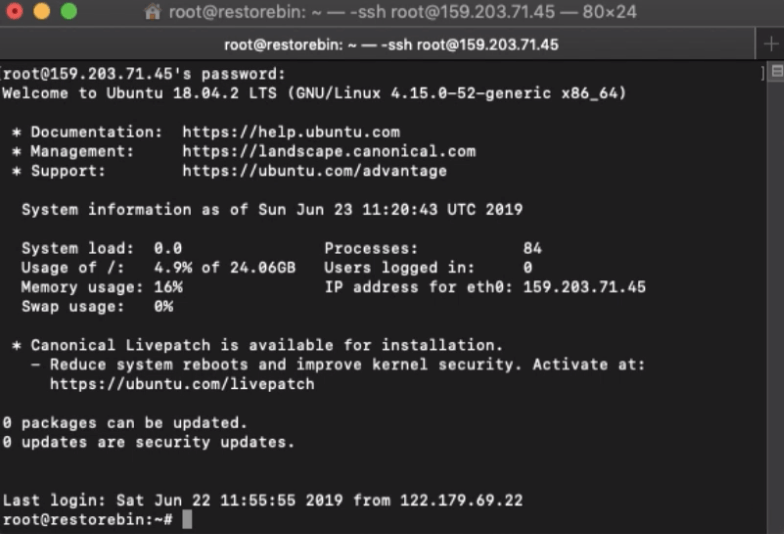
In case you’re not aware, this is the third article and video demo of the #CloudServer Series. We previously posted how to log in to SSH and SFTP clients on Ubuntu Server.
Note: The post has been updated to support the latest PHP version, however, the screenshot/images still reflect the older version.
Let’s start with learning about the LEMP stack —
What is the LEMP Stack?
DigitalOcean defines it as:
The LEMP software stack is a group of software that can be used to serve dynamic web pages and web applications. This is an acronym that describes a Linux operating system, with an Nginx web server. The backend data is stored in the MySQL database and the dynamic processing is handled by PHP.
Linux Operating System:
Ubuntu is a Linux distribution-based operating system. Apart from Ubuntu Linux, there are a couple of other famous OS under the Linux umbrella – Fedora, Arch Linux, Linux Mint, Debian, CentOS, etc.
Being open-source, Linux is a highly preferred server operating system.
Nginx Web Server:
Nginx is an HTTP that reverses proxy server, mail proxy, and TCP/UDP proxy. It also supports the front-end, just like Apache. However, compared to Apache, it’s fast and lightweight in serving static content.
Nginx is highly scalable and utilizes fewer resources than Apache, making it the #1 choice for server administrators and web application developers.
MySQL Database Server:
MySQL Server is the most popular open-source relational database management system based on structured query language by Oracle.
MySQL is mainly used for storing and retrieving the data in the SQL tables and is prominently used by web applications and online publishing tools, including WordPress.
PHP Processor:
PHP (recursive acronym for PHP: Hypertext Preprocessor) is a widely-used open source general-purpose scripting language that is especially suited for web development and can be embedded into HTML.
PHP is the server-side scripting language and a powerful tool for making dynamic and interactive web content.
How to install Nginx on Ubuntu Cloud?
Nginx is the Web Server that helps display the content on the requestors’ web browser. Hence we need to ensure that Nginx is appropriately set up and configured.
Let’s start with updating all the upgradable packages.
sudo apt-get update
sudo apt-get upgrade -y
Install the latest version of Nginx on Ubuntu using the following command:
sudo apt-get install nginx
The above command will install the Nginx web server and all supporting packages.

Now run the below command to restart nginx for the first time:
sudo service nginx restart
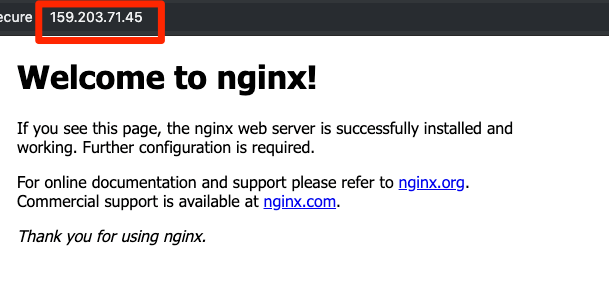
After restarting, you can visit your IP address in the web browser to verify whether the Nginx is running. You can see a message like “Welcome to nginx!”
We will be configuring the Nginx to the user PHP processor further in this guide, proceeding to MySQL database installation.
How to install the MySQL database?
We need a database server on the server to run any database-required web application like WordPress CMS. There are a couple of database servers (like MariaDB and MySQL) available on the internet; however, my personal preference is always MySQL.
If you install MySQL with the command line without naming it, it will install MySQL version 5.7.
However, I believe MySQL 8.0 is faster than the legacy version in terms of speed and database query processing. Hence, we will be using MySQL 8.0, supported by all significant web programs, including WordPress CMS.
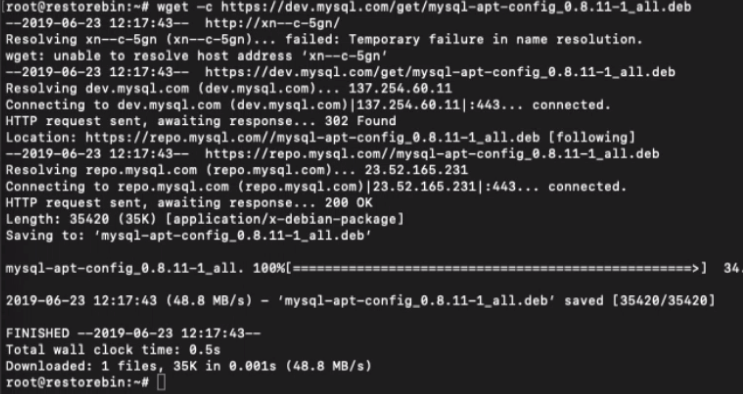
Let’s add the MySQL 8.0 into our apt repository running the below command:
wget –c https://dev.mysql.com/get/mysql-apt-config_0.8.10-1_all.deb
Now configure the MySQL package using dpkg command:
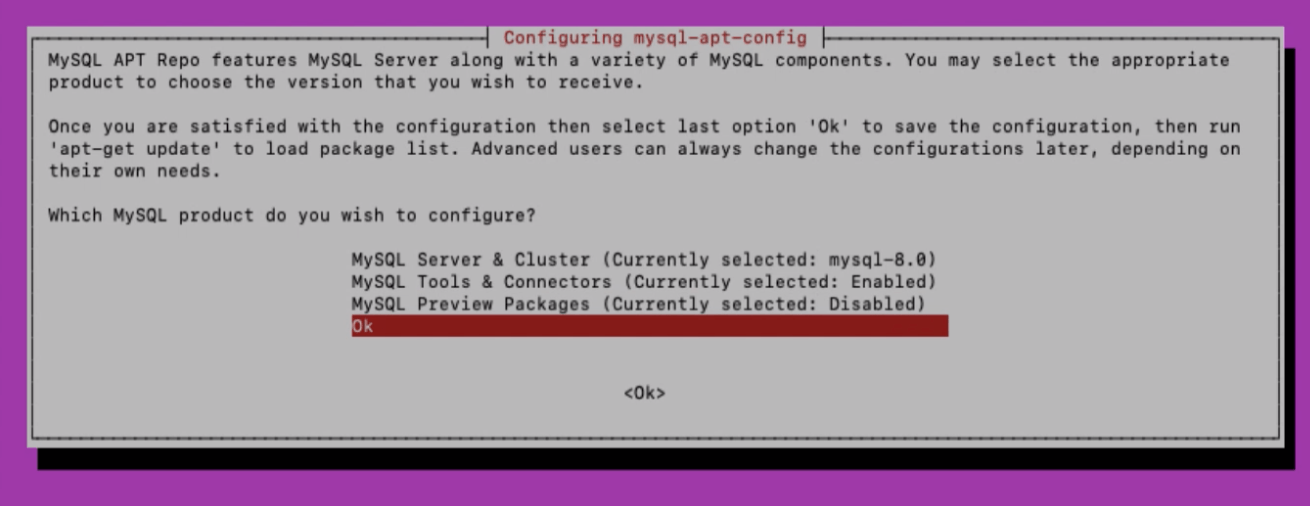
sudo dpkg -i mysql-apt-config_0.8.10-1_all.deb
This command will ask you to select & verify the MySQL Server. If the current value is set to mysql-8.0. Then navigate to the Ok command and hit [Enter].
Now the default MySQL installation package is changed from version 5.7 to 8.0.
Run the below command to update the apt library and proceed with the MySQL 8.0 installation.
sudo apt-get update
sudo apt-get install mysql-server -y
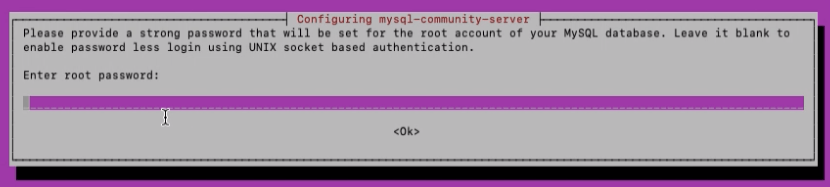
You’ll be asked to set up the MySQL root password through the installation process. For security, ensure you do not set the same Ubuntu root user password as the MySQL root password.
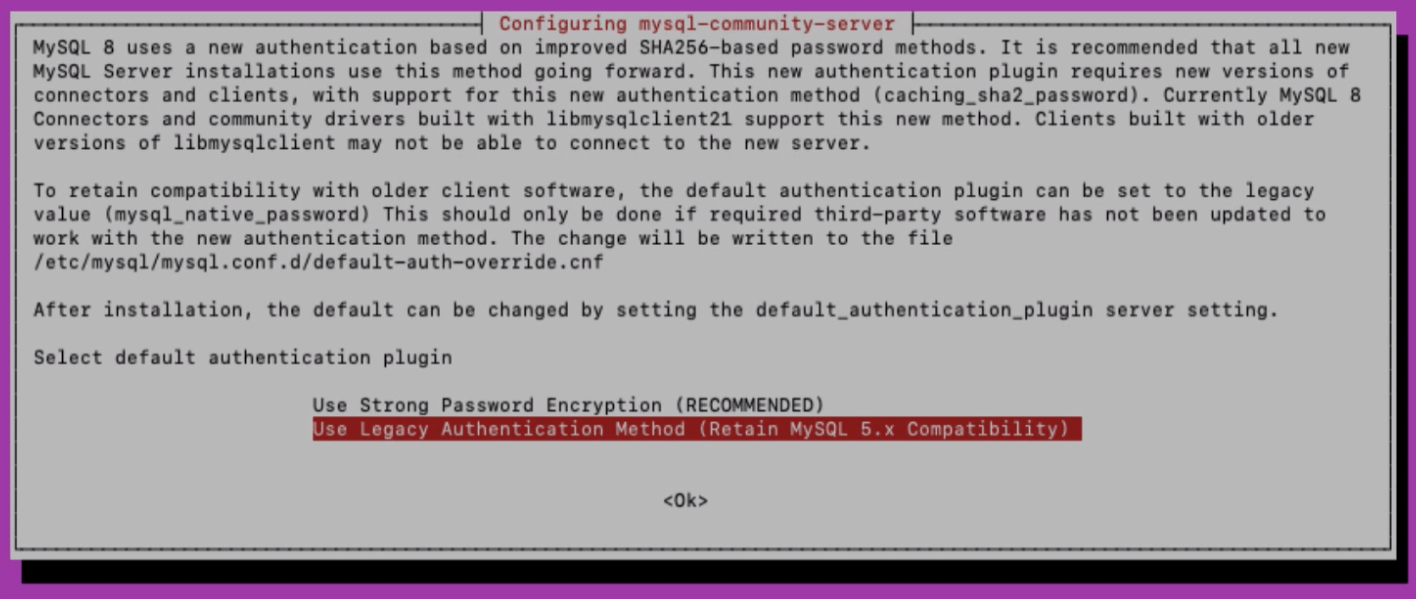
Next, you will be asked for MySQL Authentication configuration. Read through the complete setup and use arrow keys for navigation. Select <Ok> on first window and proceed to next.
You’ll be asked for the default authentication plugin method in the second configuration window.
Select the second option, i.e., Use Legacy Authentication Method (Retain MySQL 5.x Compatibility), and hit the [Enter] button.
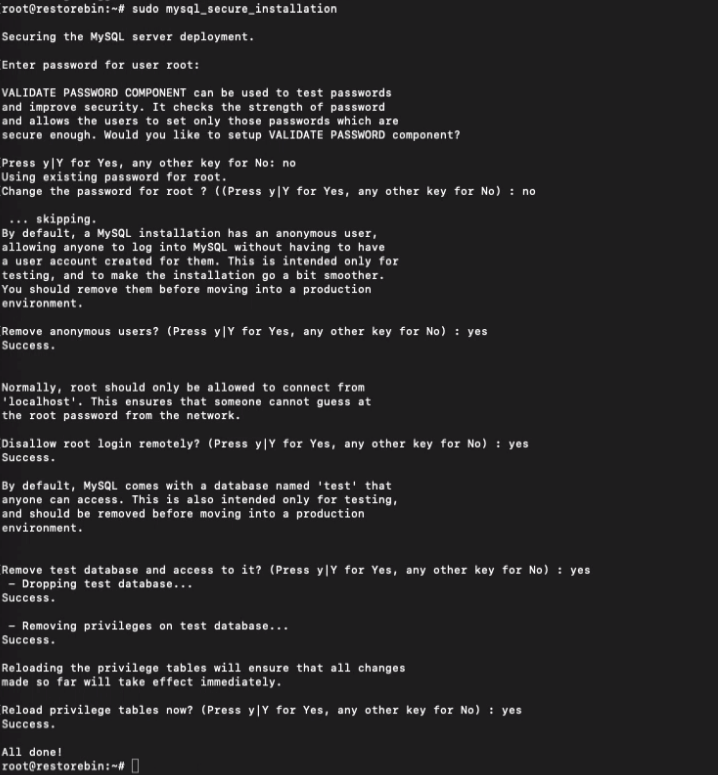
Next to security setup, the MySQL installation is insecure by default; however, a small command line will help improve overall security.
Now, let’s secure the MySQL installation by running the following security script command:
sudo mysql_secure_installation
- First, you’ll be asked to enter the MySQL root password which we created while installation — enter the root password and proceed
- Next, it will ask whether to use VALIDATE PASSWORD PLUGIN — assuming that you’ve already set a solid MySQL root password, enter no and proceed
- Next, I will be asking whether to change the password for MySQL root user — enter no since we already have a strong password for the root user
- Next, we will ask whether to Remove anonymous users? – enter yes
- Next, Disallow root login remotely? — enter yes
- Next, Remove the test database and access it? — enter yes
- Next, Reload privilege tables now? — enter yes
- Finally, it will show All done! message
The MySQL 8.0 server installation is now secured. Check the status of the MySQL service, and enable it if it’s not running by executing the below commands in SSH.
sudo systemctl status mysql
sudo systemctl enable mysql
To login to your MySQL server again, type the below command and enter your MySQL root password.
sudo mysql -u root -p
To quit from MySQL, type the below command and hit the [Enter] button:
exit;
We’ve successfully installed MySQL 8.0 on Ubuntu Cloud Server via the SSH command line. Let’s proceed to the PHP installation process.
How to install PHP for Processing?
We’ve already installed and set up Nginx Web Server and MySQL Database Server; however, we need a processor that connects these two independent servers to generate the dynamic content.
That’s where the PHP comes into play.
Unlike other Web Servers, Nginx does not have a native processor and requires a hefty and fast processor. Hence, we will be installing the php-fpm, which stands for PHP-FastCGI Process Manager. It will help in passing the PHP request for processing.
We will be installing the latest available PHP 7.4 version.
It is said that every new version of the PHP module will be 10% faster than the preceding version. i.e., PHP 7.4 is 10% faster than PHP 7.2 and so on.
So let’s add the PHP to the aptrepository and install the latest PHP in Ubuntu.
Update and upgrade the repository and required packages using the following command:
sudo apt-get update
sudo apt-get upgrade
sudo apt-get install software-properties-common python-software-properties
Now, add the Ondřej Surý’s PPA repository using the below command:
sudo add-apt-repository ppa:ondrej/php

Rerun the update command to refresh the repository.
sudo apt-get update
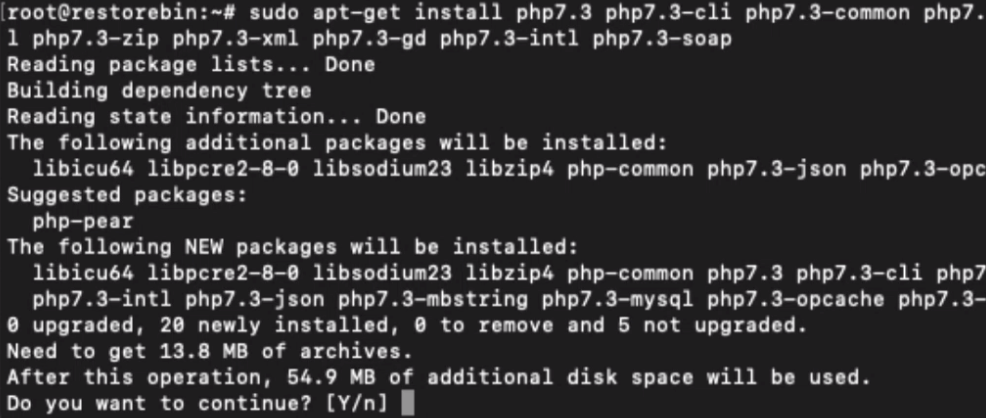
Now finally, let’s install the PHP7.4 server and necessary module packages running the below command:
sudo apt-get install php7.4 php7.4-cli php7.4-common php7.4-fpm php7.4-curl php7.4-mbstring php7.4-mysql php7.4-zip php7.4-xml php7.4-gd php7.4-intl php7.4-soap
Once completed, run the below command to verify the PHP7.4 installation:
php -v
Lastly, secure the PHP installation by modifying the configuration file.
Open php.ini file in nano editor using the command:
sudo nano /etc/php/7.4/fpm/php.ini
Look for the configuration line cgi.fix_pathinfo which will be commented with ; and the default set to value 1.
;cgi.fix_pathinfo=1
Uncomment the line and change the value to 0; the final configuration setup should look like the below:
cgi.fix_pathinfo=0

Close the nano editor in SSH by hitting [Ctrl+c] on keyboard and save the changes.
Restart the PHP7.4-FPM using the below command line.
sudo service php7.4-fpm restart
The PHP processor is now successfully installed and secured on Ubuntu Cloud Server.
Configure Nginx to Use the PHP Processor
We have installed all the necessary server components. The only pending setup is telling Nginx to use PHP7.4-FPM Processor for generating dynamic content.
We need to edit the server{} blocks in Nginx Configuration files (just like Apache virtual host file).
Open the Nginx default configuration file in nano editor.
sudo nano /etc/nginx/sites-available/default
OR, you can also use the SFTP client FileZilla to edit the config file easily.
Navigate to the Nginx folder path below, and open the default configuration file in your favorite editor like VS Code.
/etc/nginx/sites-available/
The file will look below after excluding the # commented lines.
server {
    listen 80 default_server;
    listen [::]:80 default_server;
    root /var/www/html;
    index index.html index.htm index.nginx-debian.html;
    server_name _;
    location / {
        try_files $uri $uri/ =404;
    }
}
We need to make changes to this configuration file to use PHP Processor.
- Add index.php as the first value in index directive
- Modify the server_name to listen to our IP address; in my case it’s 159.203.71.45
- Uncomment the location block which is defined to use the fastcgi-php.conf snippet and also socket associated with php7.0-fpm and modify the value to php7.4-fpm
- Finally, uncomment the location block using .ht for blocking access to .htaccess file in website root folder
Hence, the final output of the configuration file, excluding the comment lines, should look like this:
server {
    listen 80 default_server;
    listen [::]:80 default_server;
    root /var/www/html;
    index index.php index.html index.htm index.nginx-debian.html;
    server_name server_domain_or_IP;
    location / {
        try_files $uri $uri/ =404;
    }
    location ~ \.php$ {
        include snippets/fastcgi-php.conf;
        fastcgi_pass unix:/run/php/php7.4-fpm.sock;
    }
    location ~ /\.ht {
        deny all;
    }
}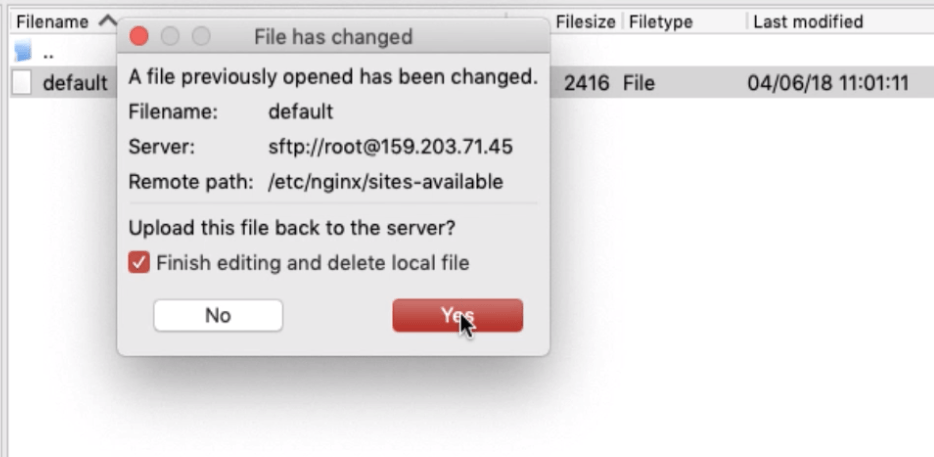
Save and close the nano editor in SSH OR the local editor in SFTP and upload the file back to the server.
Now test the Nginx configuration using the below command:
sudo nginx -t
If there are any errors, troubleshoot and close before restarting the Nginx Web server. When you’re ready to restart and commit the Nginx changes, run the command:
sudo service nginx restart

That’s it! Your LEMP stack is ready with prominent security and the highest possible configuration.
Watch the Video Tutorial of LEMP Stack
This article is purely technical, and even minor mistakes can misconfigure the LEMP Stack. Hence, watch this video for the complete step-by-step guide to installing a powerful LEMP Stack on Ubuntu Cloud Server in DigitalOcean.
I hope you liked the video; please subscribe for more videos and stay updated.
What’s next in the #CloudServer Series?
As we have already set up a robust LEMP Stack, we will install and configure Postfix on Cloud next.
If you’re following the #WordPressBlog series, continue installing the WordPress CMS on LEMP Stack. WordPress is a great blogging platform for beginners to advanced-level users. restoreBin Blog is also powered by WordPress Blogging CMS.
Stay tuned, and keep watching this space to learn more.

I follow the same step of your article but include snippets/fastcgi-php.conf;
is missing.
Hi Wasim,
Can you please let me know at which step you are facing this error? I haven’t added any nginx rule to ‘include snippets/fastcgi-php.conf’ file.
Hi Wasim, It looks like your Nginx is not installed properly. Please consider reinstalling it again.
sudo apt-get purge nginxsudo apt-get install nginxThis should delete and reinstall the Nginx server on your machine.
Let me know if you’ve any further questions. Thank you!
Hi Kushal…
Thanks for this complete tutorial, it is really helpful for the community.
But, for those who don’t want to bother installing the LEMP stack one by one, you can use the auto installer tools.
For this, I usually use the LEMPer Stack, it might be useful for auto-installing LEMP stack and at the same time to manage a vps/cloud server for hosting PHP websites without the need for control panel 🙂
LEMPer Stack
This tool is free and open source, you can contribute to its development via the Github repo.
Looking forward to your feedback/review..
🙏🏻🤗