Having a backup of your website off-site is vital, i.e., away from the local cloud server. While most hosting, including DigitalOcean, provides the weekly backup as a service, having a remote back of the entire website is a must.
A remote backup can be in Google Drive, OneDrive, Dropbox, or anything not closely connected to your cloud service provider.
This article will teach us how to set up the WordPress remote backup using a free WPVivid backup plugin. Our backup includes the WordPress Database and the files (the entire website). We will also set up the free WordPress auto-backup using the scheduling feature available in this plugin.
If you’re following us, this is the eleventh article and video guide in the #WordPressBlog series. We recently published about on-page WordPress SEO using Rank Math plugin.
Let’s dive into setting up the WPVivid Backup plugin for remote backup of our WordPress installation —
Installing WPvivid Backup in WordPress
Like every other plugin, the WPVivid backup plugin is available in the WordPress plugins repository for free. Follow the below instructions to install an active WPVivid backup:
- Login to WordPress Dashboard
- Navigate to Add New menu under the Plugins tab
- Search and install the WPvivid Backup plugin from the repository
- Hit on the Active command button
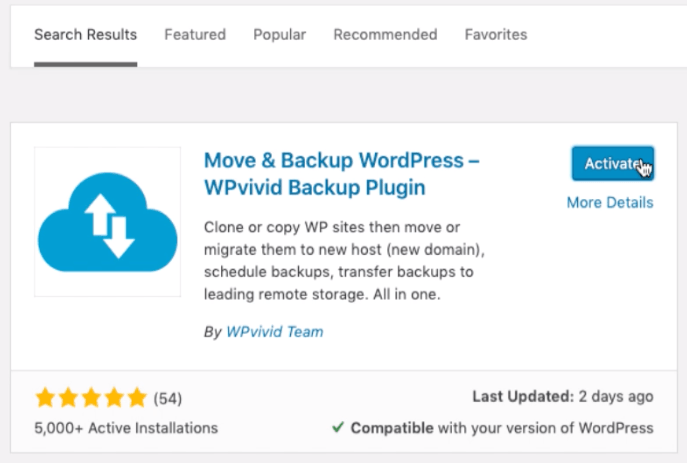
The plugin is now activated, and you’ll be able to see a new menu added in the WordPress dashboard sidebar with the name WPvivid Backup.
Configure for Off-site Remote Backup
Now we will configure and authorize remote cloud storage like Google Drive or OneDrive to dump our entire site database and files. For demoing, I will be using Google Drive storage which allows 15GB of free personal cloud storage.
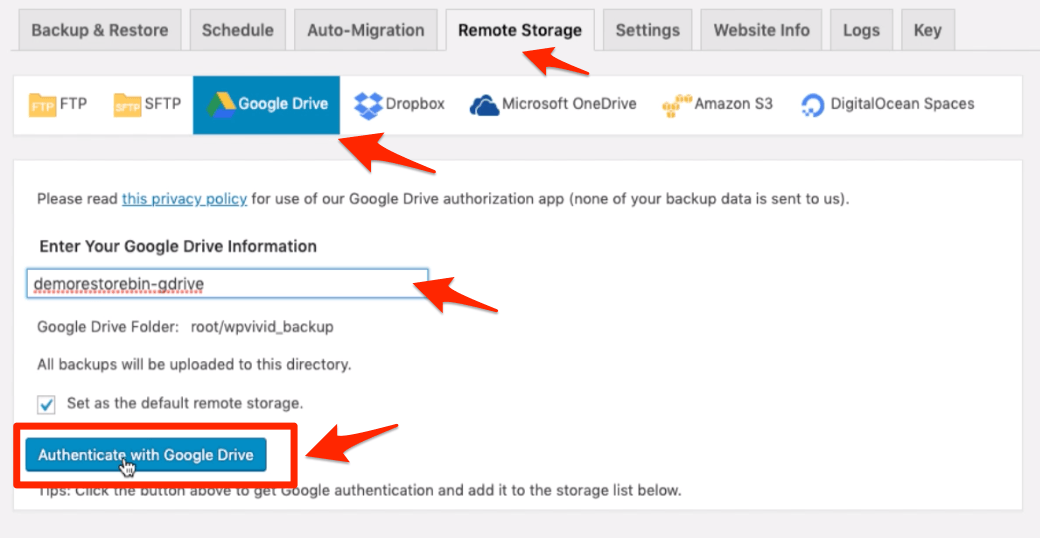
- Navigate to the Remote Storage tab within WPvivid Backup plugin settings
- Select Google Drive from the available options
- Enter Google Drive Information — a unique alias: example googledrive-backup
- Enable the checkbox to set as default remote storage
- And finally, hit on Authenticate with the Google Drive command button
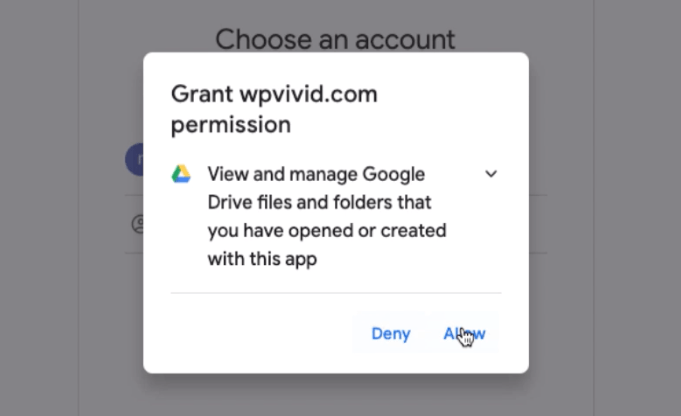
It will navigate you to your Google Account to log in and authorize the permission to access, read, and write the Google drive from WordPress. Just allow all the requested permission for smooth processing.
Once the authorization is completed, you’ll be able to see the complete remote storage access along with alias details on the same page.
We have successfully connected the remote cloud storage account (Google Drive) with the WPvivid plugin for off-site backups.
Schedule an Auto-Backup for WordPress
One of the primary features every backup plugin should have is the auto-backup. The WPvivid plugins have an excellent customization feature for enabling the scheduled backup.
The scheduled backup allows setting the interval and type of backup. Whether the entire site or only files or only the database. You can also select between a remote backup or local back in the schedule tab.
Here are the quick recommended steps for remote backup with the WPVivid plugin:
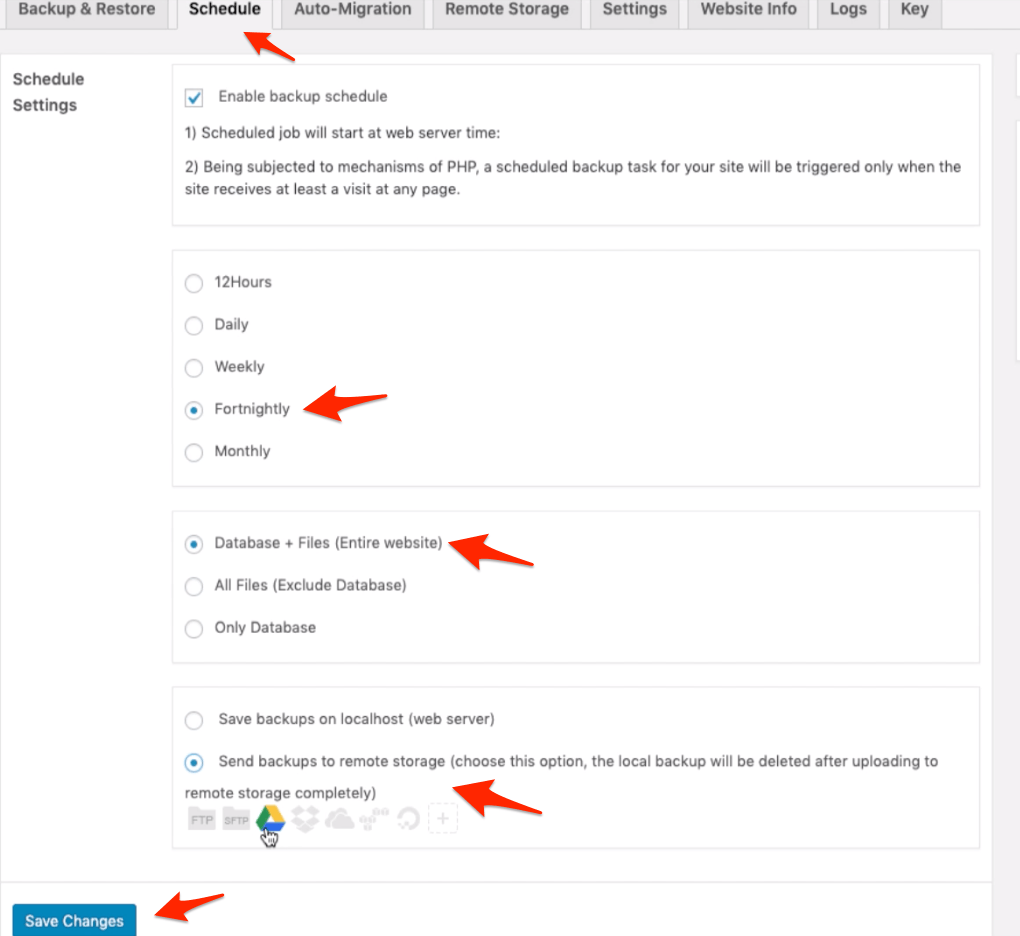
- Navigate to the Schedule tab under WPvivid backup
- Select the checkbox to Enable a backup schedule
- Select the interval per need; I prefer Fortnightly
- Select the backup type – recommend the Entire Website
- Lastly, select the remote storage that we connected in the previous section and hit on the [Save Changes] button
Now head over to the Backup & Restore tab to verify if the Backup Schedule is Enabled and check the following backup schedule per server time.

Test a Manual Remote Backup in the WPVivid plugin
Now that we have set up the remote cloud server and scheduled the backup at regular intervals let us run a manual backup to verify if the files are correctly dumped into Google Drive storage.
- Navigate to the Backup & Restore tab, which is also the home tab for the WPvivid plugin
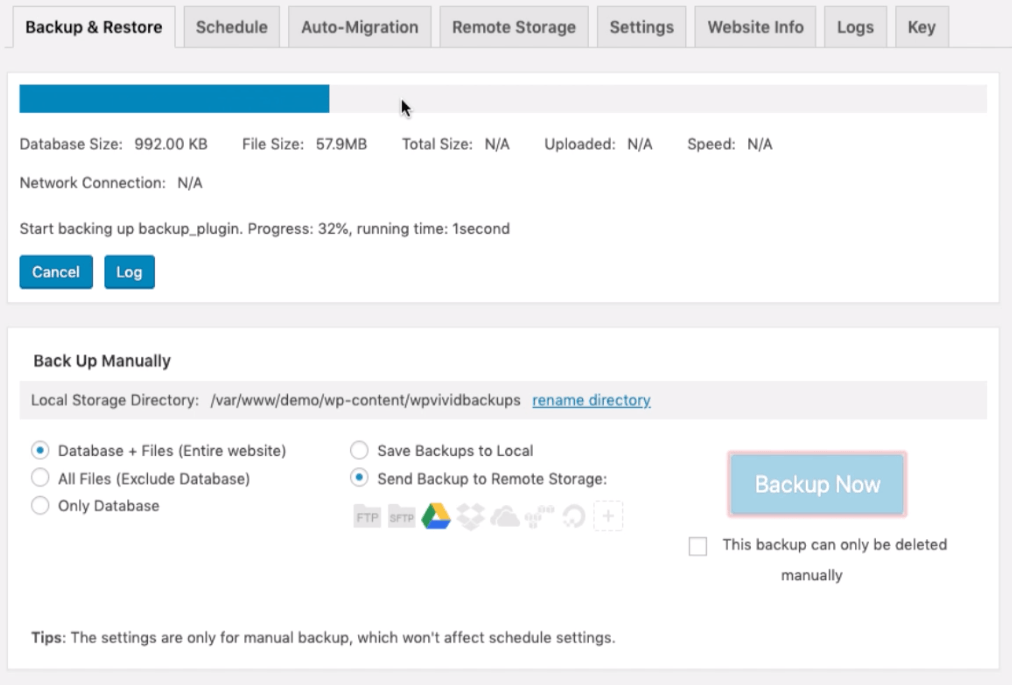
- Within the top section – Back-Up Manually select the desired backup setting.
- Entire website & Send Backup to Remote Storage
- Hit on the [Backup Now] command button in the same section
- You will be able to see the progress bar of the backup along with real-time logs.
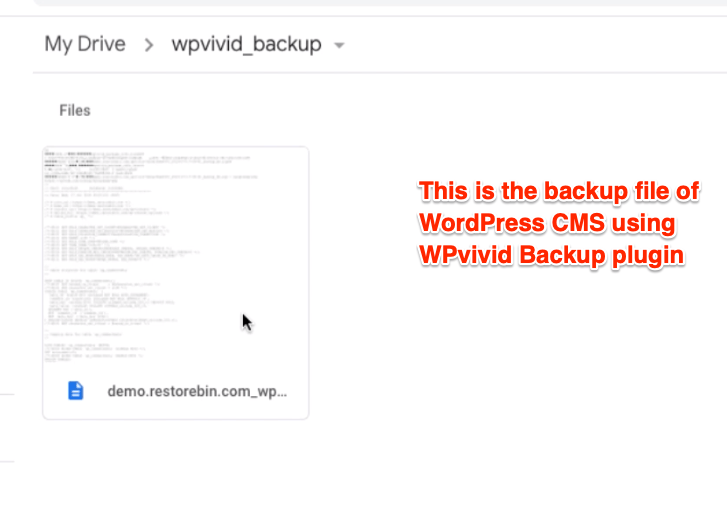
- Once the backup is processed, log into your remote cloud storage, i.e., Google Drive, and look for the wpvivid-backup folder to find the backup.
- The backup of the entire WordPress website should be available in the remote storage drive.
You can also find all the backup details in the Backup & Restore tab, along with the options to manually restore or delete the backup.
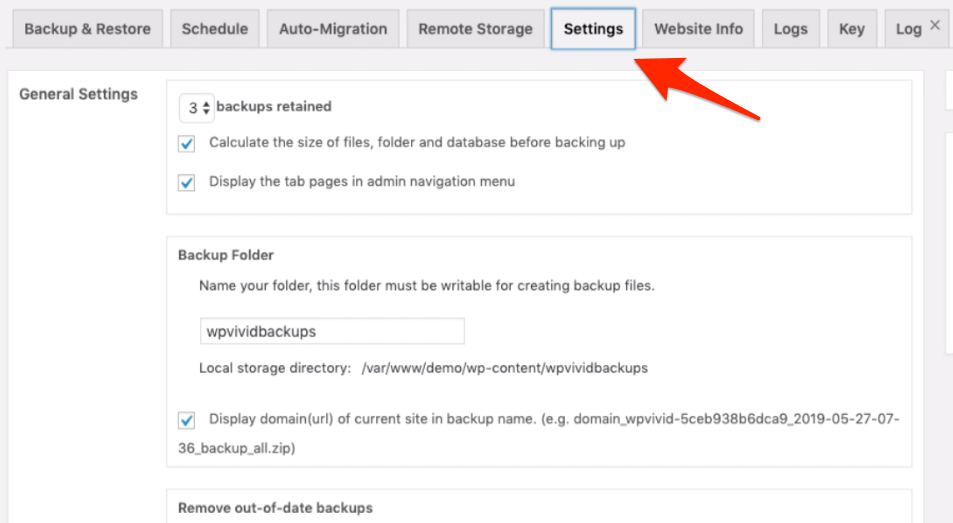
There is also a Settings tab that allows retaining the number of backups in local and remote cloud storage. We can leave these all settings options as default; however, feel free to customize per your needs.
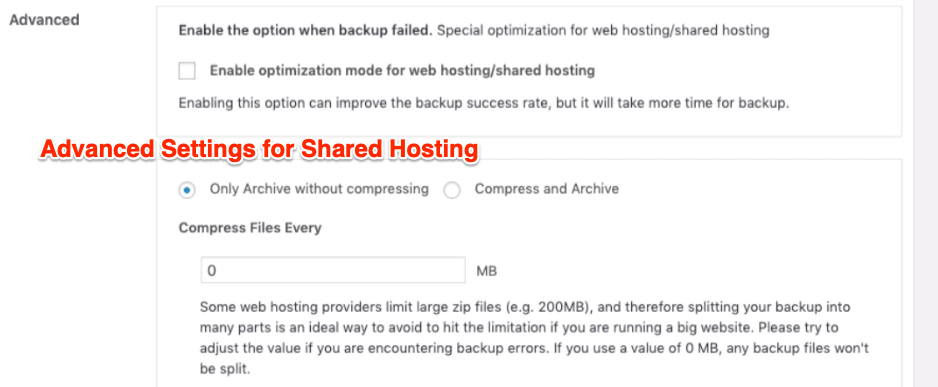
If you’re using the shared server hosting, I suggest revisiting the settings tab to optimize the backup.
Video Tutorial on WPvivid Backup Plugin
Watch the video demo on setting up a WPvivid Backup plugin for free remote backup of entire WordPress files and database into Google Drive.
I hope you liked the video; please subscribe to our channel for more videos.
What’s Next in the #WordPressBlog Series?
Now that you’ve configured the WordPress Backup using WPvivid Plugin, we are holding this series for now. We will be updating the once we come up with more guides.
Please comment below if you’ve any ideas about what extra you need in terms of WordPress Blog Setup.

