The ability to extend the features using WordPress plugins is one of the primary reasons most bloggers and web developers use it. WordPress has been in the market for more than 15 years now, and still, it’s most preferred.
The ability to add, delete and update plugins is seamless. And there are many Plugins in the WP repository for every need.
In this post, I will cover basic and advanced WordPress plugins for every user to skyrocket their blog.
If you are following us, this is the fifth article and video demo in the #WordPressBlog series. We recently posted about WordPress Appearance settings covering themes, site branding, and a built-in editor.
Let’s dive into WordPress Plugins installation and configuration right away —
What are WordPress Plugins?
WordPress is developed based on themes and plugin architecture. WordPress is the #1 choice for any web developer and even a noob. The plugins unlock all the barriers to using WordPress to the full extent and also mold per needs.
Suppose you want to add any extra feature that is not readily available in WordPress, then you can search and install any community-developed plugin from the WordPress Plugins repository. You even can develop your plugin and install it.

Most of the plugins available in the repository are Freemium. This means you can use certain features for free. However, if you need any advanced options, you may need to upgrade and buy a premium version.
While WordPress Plugins are great, but also have some caveats. If you install too many plugins, it might severely affect the performance and speed and result in server issues.
Keeping the Plugins at the limit is strongly recommended, and installing only those required. If there are any plugins that you no longer need, deactivate and delete them from the WordPress blog.
WordPress Basic Plugins
These are some of my essential WordPress Plugins that will be useful for everyone.
However, this doesn’t mean you should restrict to these only. If you find any alternative best options, please feel free to drop them below comment — I will be happy to test and update the list if required.
Akismet Anti-Spam
This plugin comes pre-installed in WordPress and is one of the best for spam comment protection. The WordPress blog attracts many spammers, and these spambots are clever enough to bypass comment’s security setup.
The Akismet plugin recognizes these spam comments within WordPress and is automatically marked as Spam. Thus reducing your workload to manage the comments and mark each spammy comment as a SPAM.
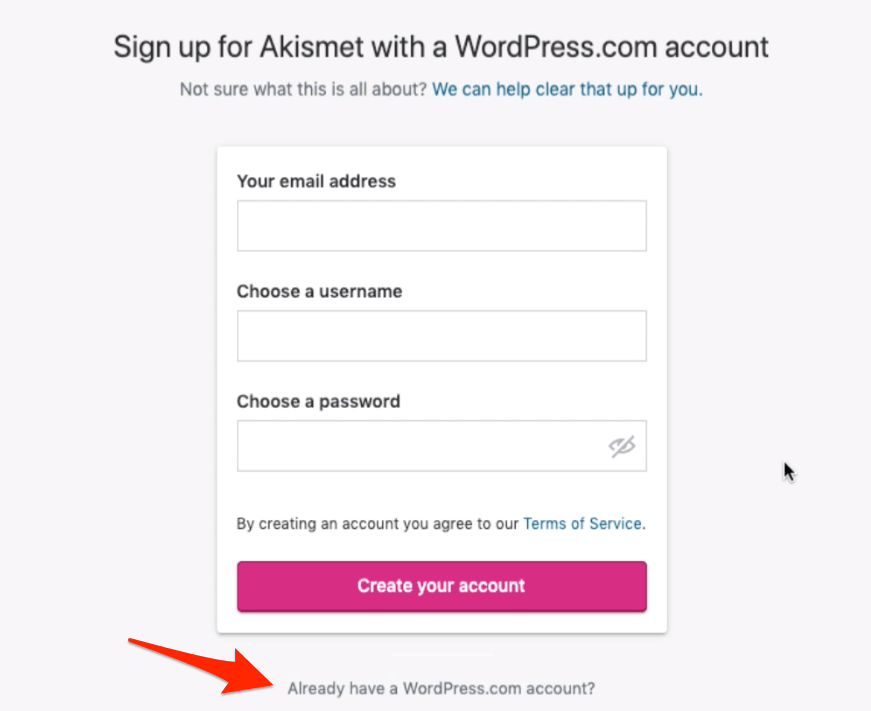
All you need is to configure the Akismet plugin with an API key, and the plugin will do the work. You need to register on the WordPress.com website to get the API key.
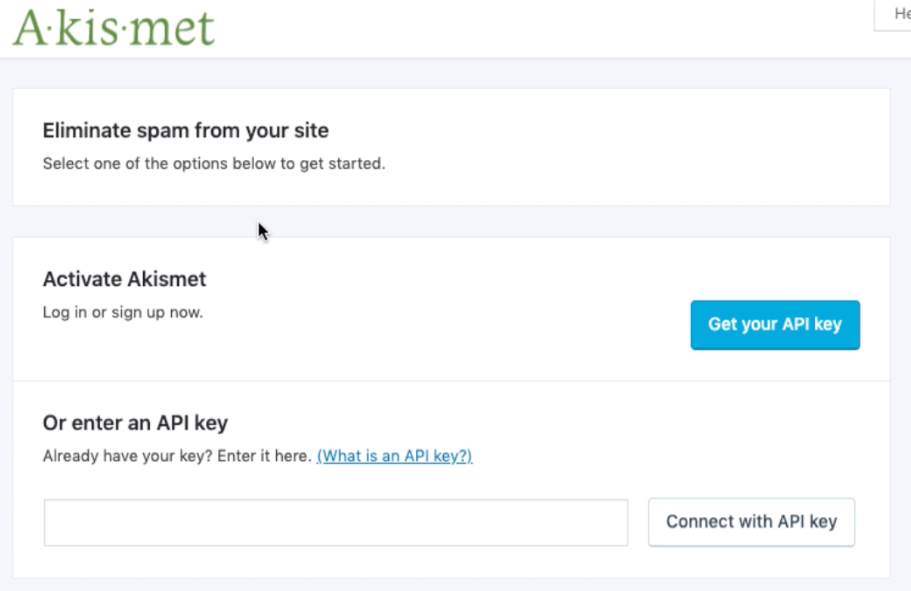
Follow the steps below to configure the Akismet Anti-Spam plugin:
- Install and Active the Plugin in your WordPress CMS
- Access the Akismet site to get started with Personal for free
- Register on the WordPress.com website or log in if you already have an account
- Generate an API key
- Copy and paste the API key into your WordPress Akismet setup page
- Save the settings
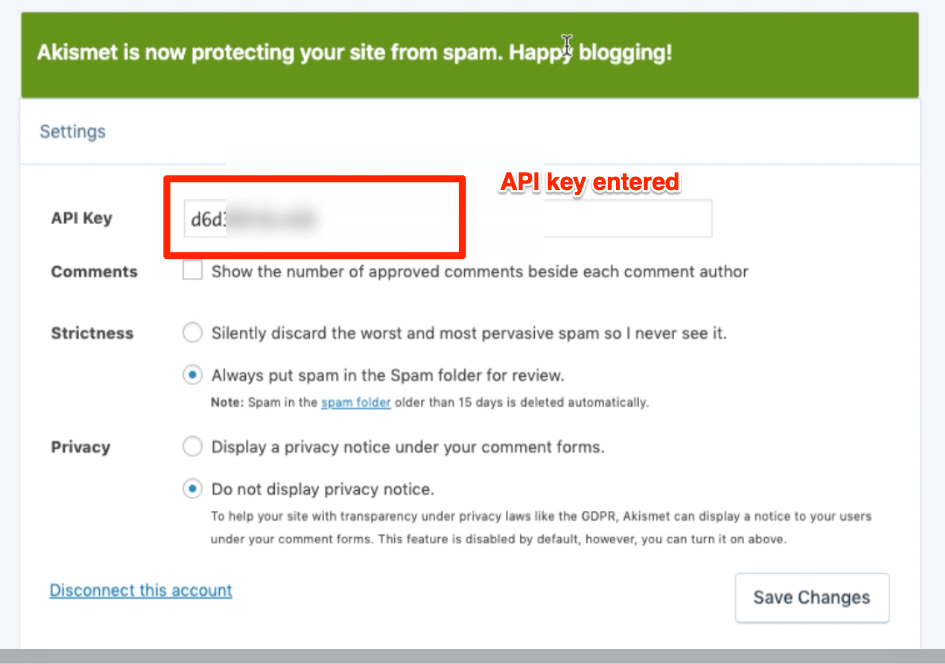
That’s it. Your Anti-spam plugin has now been set up, and your blog is now spam-free.
The plugin will make all the irrelevant comments you can see under the “Spam” bucket in the comments tabs. You can visit the Spam section and wipe out all with a single button click.
Classic Editor
In December 2018, WordPress released a significant upgrade in the editor called Gutenberg OR Block editor along with the Twenty Nineteen theme.
WordPress was super excited about this upgrade; however, most bloggers and business owners we not comfortable switching to this. They still wanted to have the old traditional editor.
Hence, along with collaborating with a few community developers, they introduced this sweet plugin called Classic Editor.
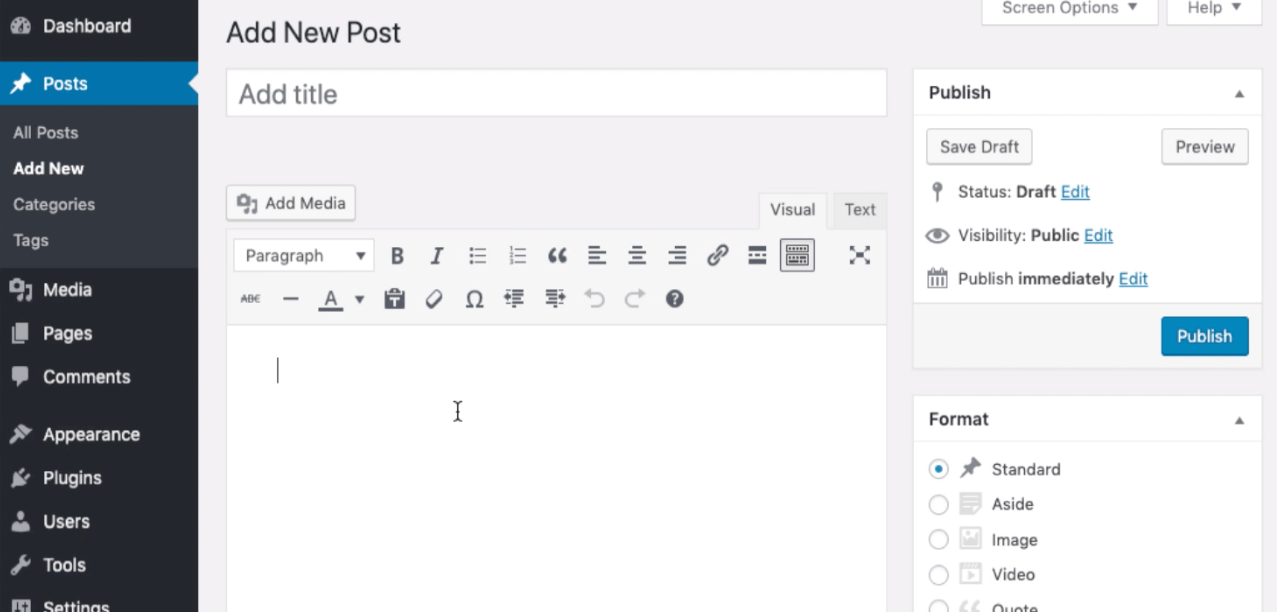
If you’re relatively new to WordPress, I suggest getting used to this new block editor. However, if you like an editor that looks similar to Microsoft Word and Google Docs, then the Classic Editor plugin is your buddy.
Follow the steps to install and configure the Classic Editor plugin.
- Search and Install the Classic Editor from the WordPress plugin repository
- Active the plugin from the Installed Plugins menu
- Navigate to Settings > Writing tab in WordPress Dashboard
- Select the Default editor for all users to Classic Editor
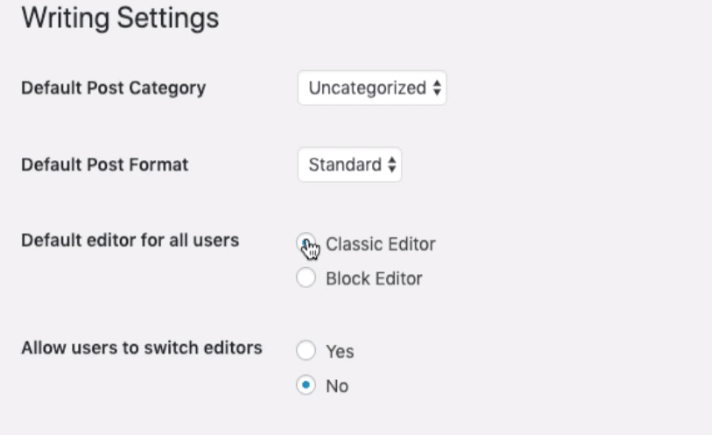

- Next, based on your personal preference — Allow users to switch editors to either Yes or No
- Hit on the Save Changes button
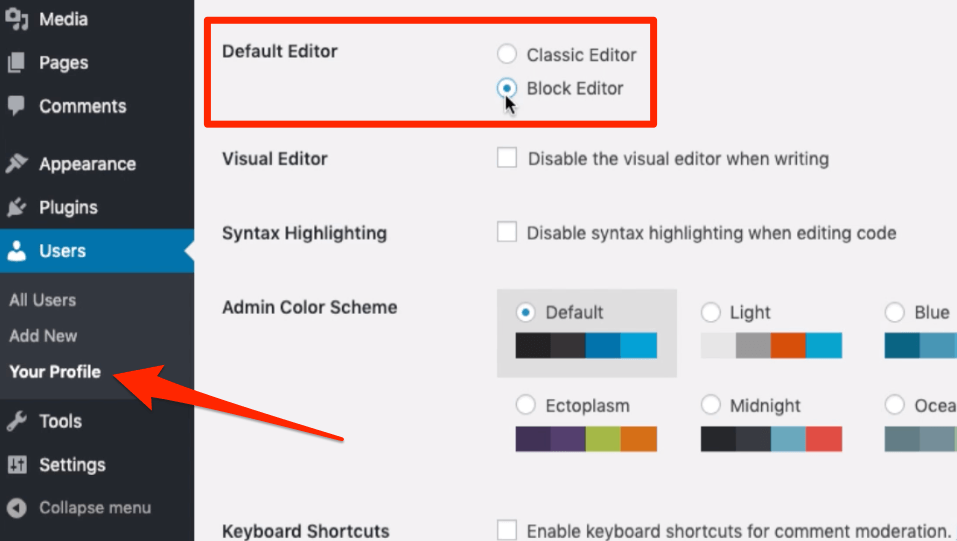
If you select Yes in step #5, you or any registered users can switch between the Classic or Block editor option from the User Profile page under the Users tab.
Contact Form 7
If you’re running a blog or a business website using WordPress, you need to have a contact page where the user will be able to send the contact request form.
WordPress readily does not have the feature to create a contact us form. That’s where the Contact Form 7 plugin becomes a savior. All you need is to configure the contact form and copy the shortcode into a Page.
Follow the below steps to configure the Contact Form 7 plugin and publish it on a page:
- Search and install Contact Form 7 from the plugin repository
- Activate the Plugin in WordPress — it will add a new Contact menu to the dashboard
- Under the Contact menu, hit on Add New tab
- Give the contact form a name; say Contact Us
- Under the Form tab, you can customize the form template following this guide. However, I think the default form template is good; you don’t need to modify it.
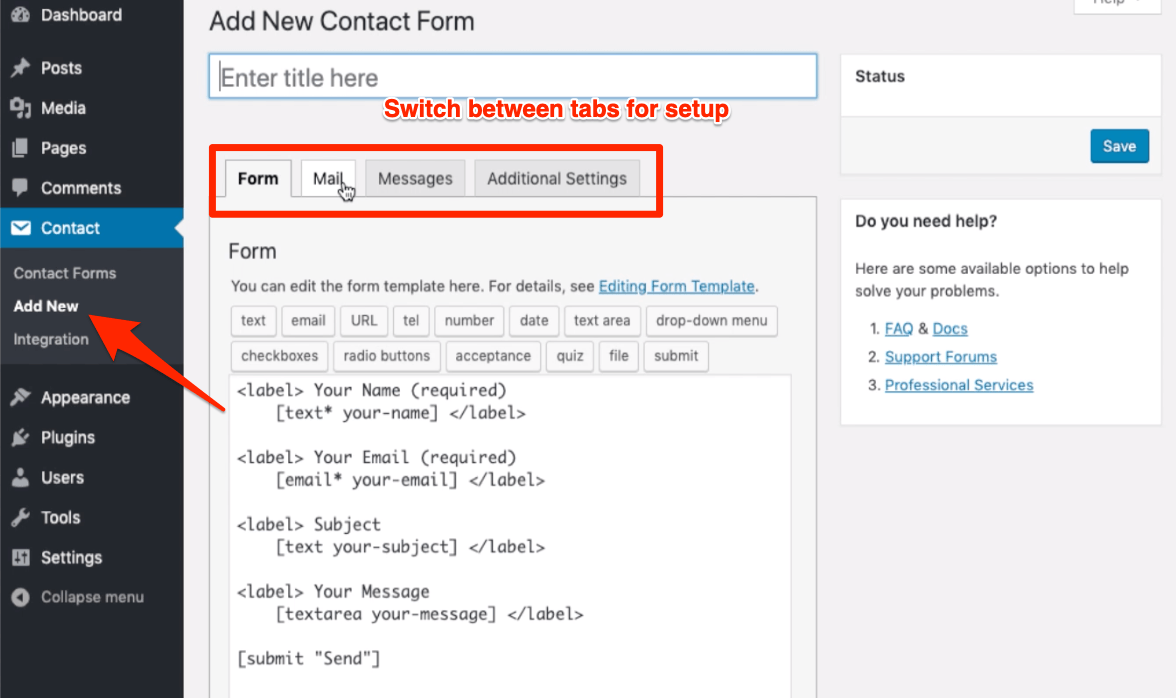

- Switch to the Mail tab, and check if From, To, and other options available look good here.
- Check the other two tabs – Messages and Additional settings; customize per your needs.
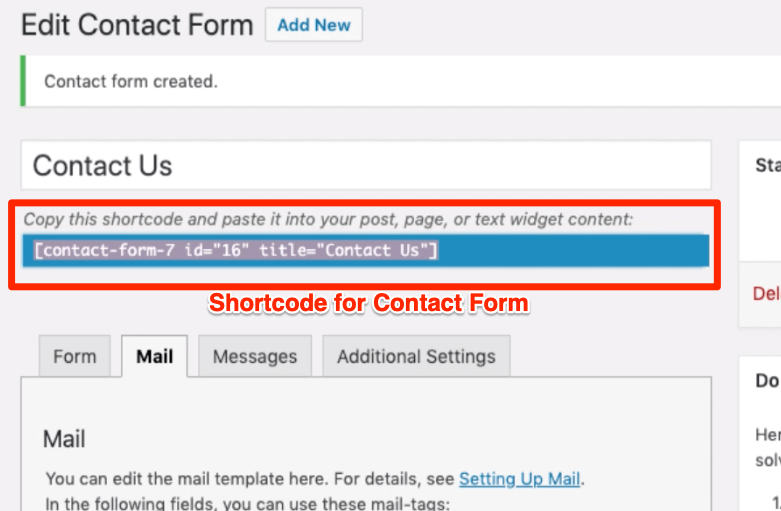
- Hit on the Save button to generate a shortcode something like this: [contact-form-7 id="3" title="Contact Us"]

- Copy the shortcode and create a new page (not a post)
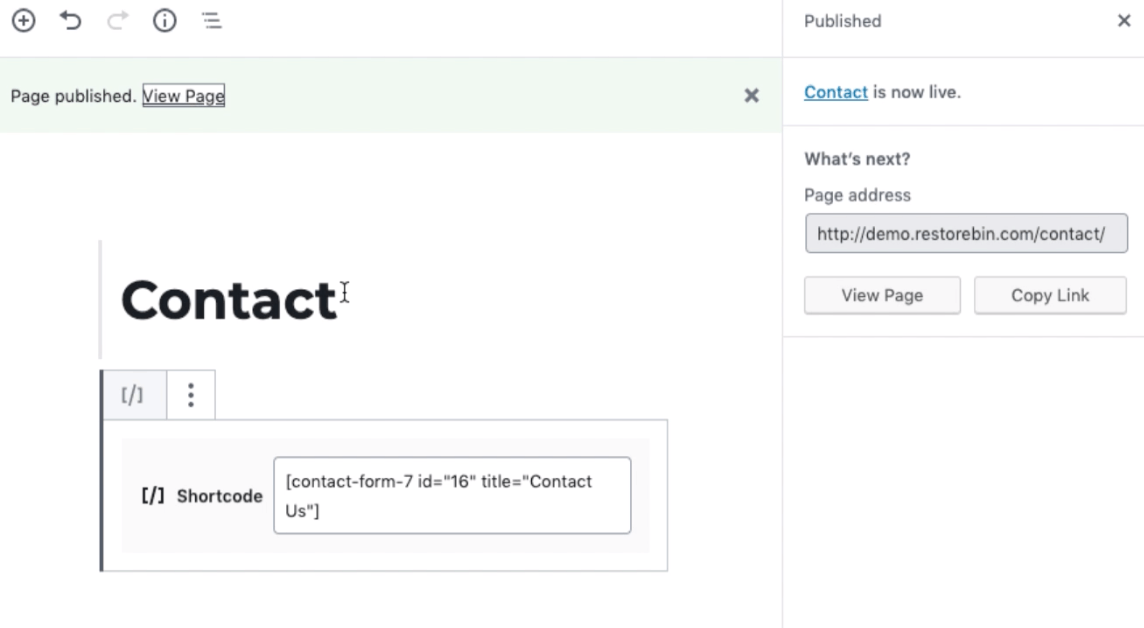

- Name the page as Contact Us, paste the copied shortcode and publish the page
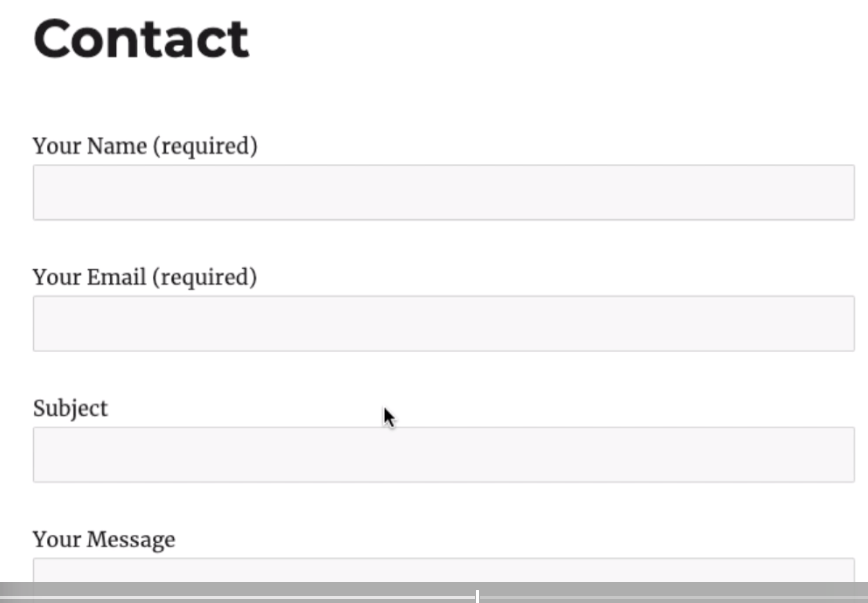
Check out the page to see if it looks good. To modify the look, you can adjust the Form Template as mentioned in step #5.
You can also hyperlink the form to Primary Menu to make it visible on top of the page.
WP Sitemap Page
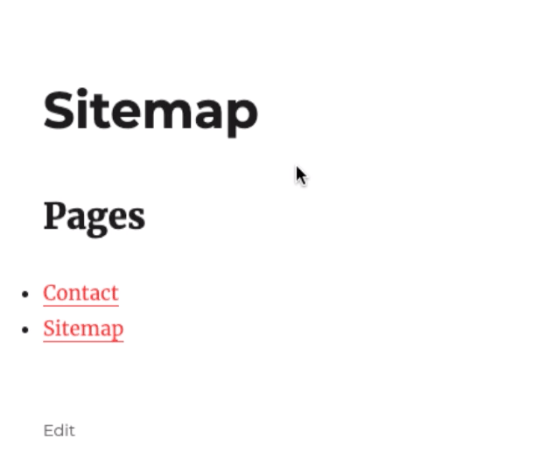
The sitemap is one of the primary pages you should have on your blog or business site, along with About Us, Contact Us, and Privacy Policy. Even I have got the sitemap page on the restoreBin blog.
This is the quick link page with all the links to your blogs and defines the structured hierarchy of the website or blog for ease of navigation. But, please do not get confused with XML Sitemap, which is different, and I will be covering this later.
It’s pretty tricky to add the new blog post or pages manually you create regularly. Hence, the WP Sitemap plugin helps automatically update the Sitemap page links.
The installation is quite simple, just with a shortcode. Follow the steps to install the WP Sitemap plugin:
- Search and install the WP Sitemap plugin from the WordPress repository
- Activate the Plugin from the Installed Plugin pages
- Create a new Page in WordPress with a name Sitemap
- Paste this shortcode in the content section – [wp_sitemap_page]
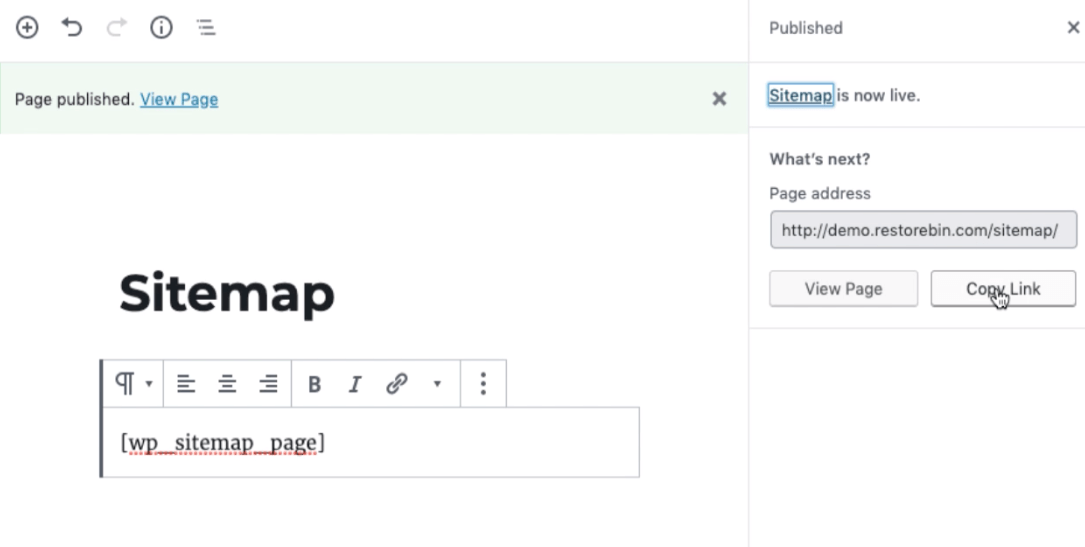

- Publish the post and see the changes live
If your theme supports the footer widget area OR footer navbar, you can consider adding this sitemap to the menu link list.
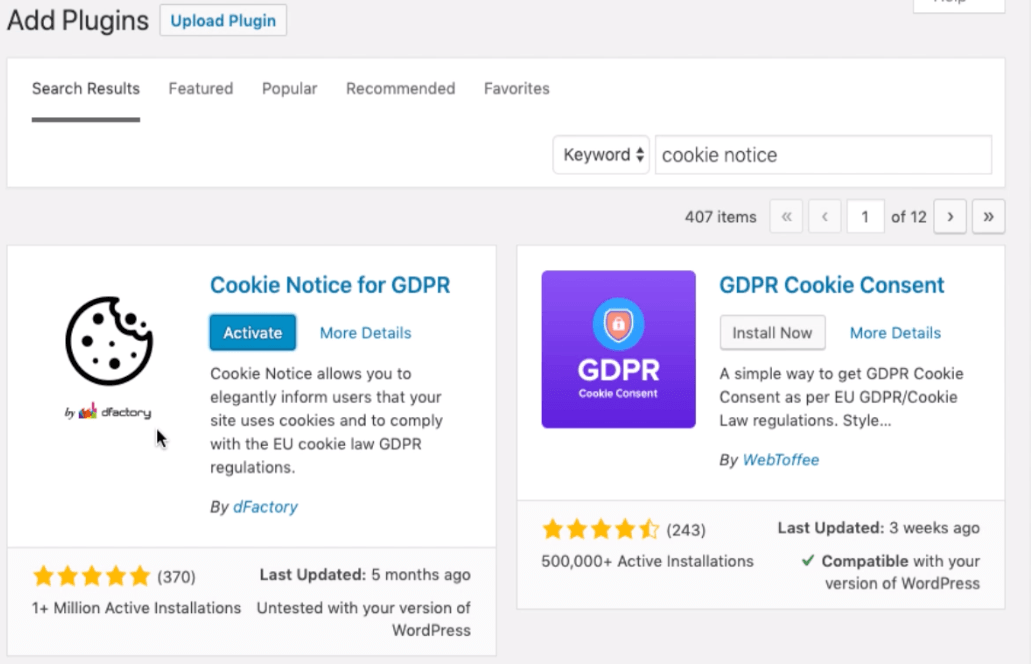
Cookie Notice WordPress Plugin
One of the primary requirements after the GDPR compliance policy is to display the cookie notice to all the users.
If you’re using AdSense or Google Analytics, you must display this notice mandatorily. This plugin, Cookie Notice, makes the job easier.
Follow the steps to add Cookie Notice to WordPress:
- Search and install Cookie Notice by dFactory

- Activate Cookie Notice from Install Plugin list
- Navigate to Settings > Cookie Notice from WordPress Dashboard
- Configure plugin settings per need and instructions on the page
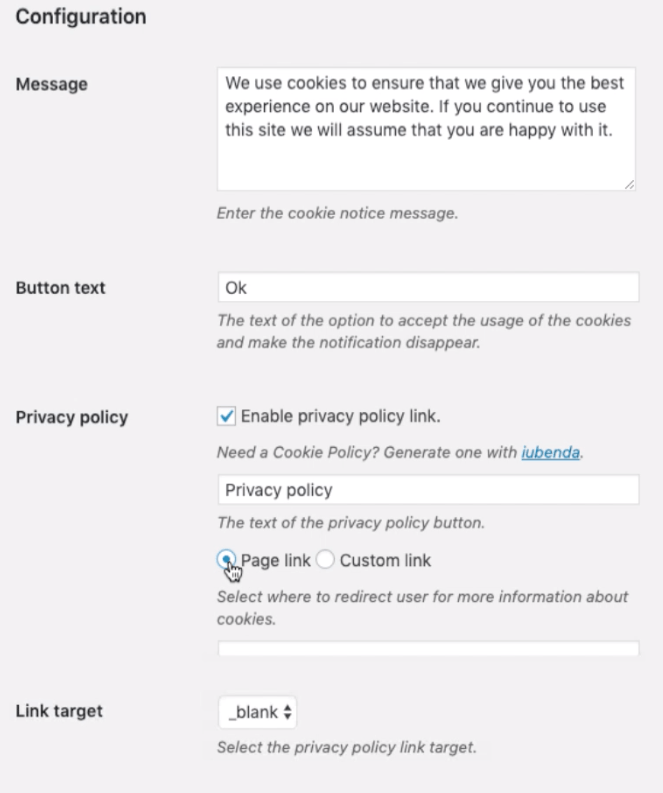

- Once done, hit on [Save Changes] button, and visit the blog to visualize the notice bar

Your cookie notice bar is set up. You can also adjust the look and feel of this bar on the exact configuration page.
Easy Table of Contents
This fantastic plugin adds the Table of Contents section in WordPress. It was inspired by Wikipedia sections and recommended by the SEO community to improve the SEO ranking.
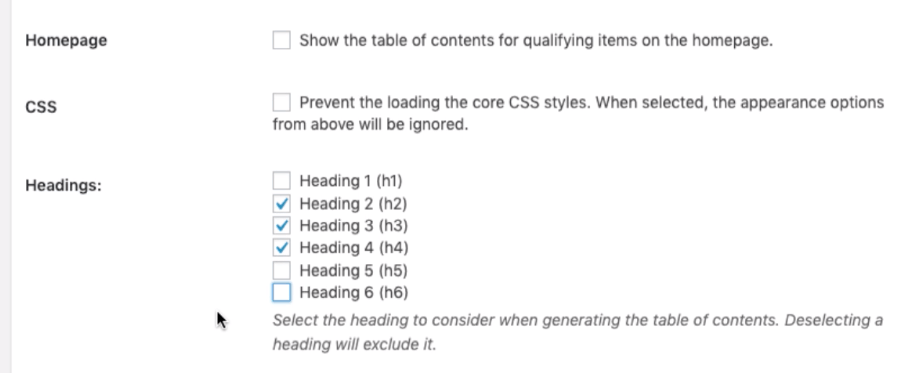
However, I feel this is an excellent plugin for creating intra-page-navigation links within the post. You can adjust the settings to display only particular tags H2, H3, H4, or whatever you need.
You can also adjust its position to add the table of content either at the top or after a few paragraphs, etc. The skin is highly customizable.
Follow the steps to add the Easy Table of Contents plugin in the blog post:
- Search and install the Easy Table of Contents plugin
- Activate the Plugin after installation from the Installed Plugin page
- Navigate to Settings > Table of Contents menu
- Setting the configuration per your need, it’s pretty easy and simple
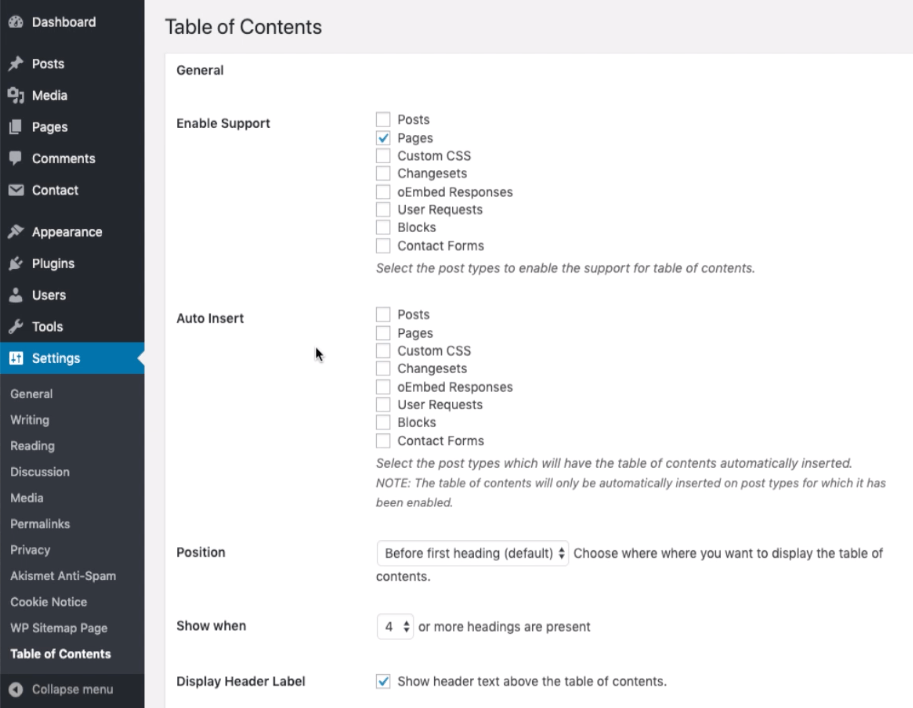

- Once the setting is done, just hit on the [Save Changes] command button at the bottom
- Visit your blog post to see the automated table of content added per your settings
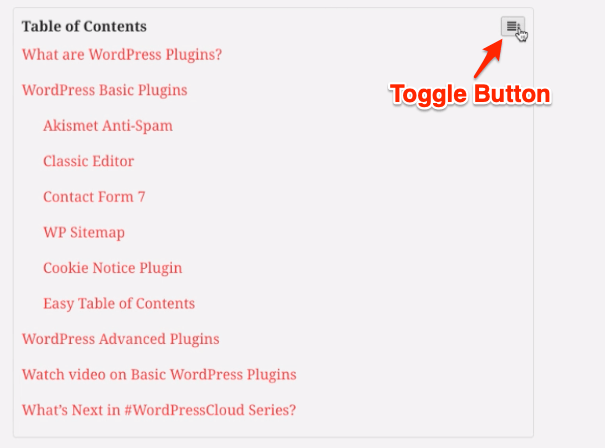
You can highly customize the table of the content displayed in your blog post.
WordPress Advanced Plugins
You’ve already learned about the basic WP Plugins and their uses. These are the list of advanced WordPress plugins I use on the restoreBin blog. I will cover these as a part of the series in upcoming articles and videos.
These all plugins are crucial to keep your WordPress smooth, optimized, and secured. Most of these plugins need you to have access to SSH and SFTP to configure; hence I always recommend using Cloud Server rather than a cheap Shared hosting.
- Rank Math SEO — This is the new SEO plugin I’ve used for several months. I feel this is more powerful with great features missing in the Yoast SEO (free) plugin.
- CDN Enabler — These plugins help enable the CDN URL for media and images.
- NGT jsDelivr CDN — This is another super helpful plugin I use to off-load the static JS and CSS files to save the server bandwidth. All you need is to install and activate this plugin, which will take care of the rest.
- Nginx Cache — I use Nginx server-side caching, and this plugin helps clear the obsolete cached files after updating the post and pages on the WordPress blog.
- Redis Object Cache — This is another server-side caching plugin that helps to cache complex database queries.
- WP fail2ban — This plugin is used to set up a fail2ban server-side program that helps secure the WordPress login attempts. You can define the number of times a bot or user can attempt invalid authentication before banning the IP address.
- WP-Optimize — This is another excellent plugin to optimize and clean the database. Whenever you delete any plugin or settings, the traces are left in our database. This plugin not only helps to identify but also removes the records. The plugin recently added a feature to compress and optimize the image size using WP Smush API.
- WPvivid Backup Plugin — This is a fantastic plugin to create and restore the backups in an off-site location. You can create and retains backup in Google Drive, OneDrive, Amazon Cloud, etc. You can also schedule the Backup intervals like daily, weekly, monthly, etc.
Watch video on Basic WordPress Plugins
You can watch this video on how to install WordPress Plugins, and I’ve also covered setting up a few plugins from the list.
I hope you liked this video; please subscribe to our YouTube channel for more videos.
What’s Next in the #WordPressBlog Series?
While we have covered only the basic WP Plugins in this article, I will be posting about advanced WordPress Plugins in the next couple of articles.
We will start with security plugins – WP fail2ban and later move into the optimization and CDN plugins setup.